
Introduction to Zesty Crunchy Dilly Beans
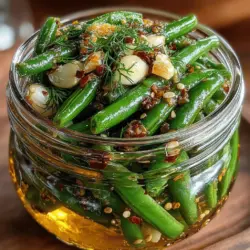
Zesty Crunchy Dilly Beans are not just another pickled vegetable; they are a vibrant celebration of flavor and texture that can elevate any meal. This refreshing pickled side dish captures the crispness of fresh green beans and marries it with a zesty brine infused with garlic, dill, and a hint of spice. Ideal for summer barbecues, picnics, or as a tangy snack, these dilly beans offer a delightful crunch that is sure to please pickle enthusiasts and newcomers alike.
The beauty of Zesty Crunchy Dilly Beans lies in their versatility. Whether you are looking to preserve the bounty from your garden or simply add a zesty treat to your pantry, this recipe is easy to follow and yields fantastic results. With their bright flavor and eye-catching appearance, they are perfect for enhancing a charcuterie board or serving alongside grilled meats.
Understanding Dilly Beans: A Flavorful Tradition
To truly appreciate Zesty Crunchy Dilly Beans, it’s important to understand their rich history and cultural significance. The art of pickling dates back thousands of years, with roots in ancient civilizations that used preservation methods to extend the life of vegetables and fruits. In American cuisine, pickling gained popularity in the 19th century, when home canning became a common practice to preserve food through harsh winters.
Dilly beans, a specific type of pickled green beans, have become a beloved snack and side dish in various regions of the United States, particularly in the Midwest. Their unique flavor profile, characterized by the aromatic essence of dill and the crunch of fresh green beans, makes them a favorite accompaniment to sandwiches, salads, and barbecued dishes.
The popularity of these tangy green beans can be attributed not only to their delicious taste but also to their health benefits. Pickled vegetables, including dilly beans, are often low in calories and packed with nutrients. The fermentation process can enhance their probiotic content, promoting gut health and aiding digestion.
Ingredients Breakdown for Zesty Crunchy Dilly Beans
Creating Zesty Crunchy Dilly Beans starts with selecting the right ingredients, each playing a crucial role in achieving the perfect balance of flavors.
– Green Beans: Choosing the Right Variety
The star of this recipe is, of course, the green beans. For the best results, opt for fresh, young green beans that are crisp and vibrant. Varieties such as French haricots verts or regular snap beans work wonderfully. Look for beans that are firm, with no blemishes or soft spots. The fresher the beans, the crunchier your final product will be.
– Distilled White Vinegar: The Importance of Acidity in Pickling
A key component of the pickling brine, distilled white vinegar provides the necessary acidity to preserve the beans and enhance their flavor. The sharp, tangy profile of white vinegar complements the green beans beautifully and helps to maintain their crisp texture. For those looking for a milder flavor, apple cider vinegar can be used as a substitute.
– Kosher Salt: Why It’s Essential for Flavor and Preservation
Kosher salt is preferred in pickling recipes for its purity and ability to dissolve easily. It enhances the natural flavors of the ingredients while also aiding in preservation. Be cautious not to use table salt, as it often contains additives that can cloud the brine and affect the taste.
– Spices and Aromatics: Enhancing Flavor Profiles
The blend of spices and aromatics used in the pickling brine is what sets Zesty Crunchy Dilly Beans apart. Traditional ingredients include garlic cloves, fresh dill (or dill seeds), and red pepper flakes for a touch of heat. These elements work together to create a well-rounded flavor that complements the crunchy beans.
– Optional Ingredients: Customizing Your Dilly Beans
While the basic recipe is delicious on its own, you can customize your dilly beans with additional ingredients. Consider adding mustard seeds, black peppercorns, or even a slice of onion for a unique twist. Experimenting with different spices allows you to tailor the flavor to your personal preference.
Step-by-Step Preparation of Dilly Beans
Once you have gathered your ingredients, it’s time to dive into the preparation of Zesty Crunchy Dilly Beans. This step-by-step guide will ensure that you achieve the perfect balance of flavor and texture.
– Preparing the Green Beans: Blanching Process Explained
Start by thoroughly washing the green beans and trimming the ends. To maintain their vibrant color and crispness, blanch the beans in boiling water for 2-3 minutes. This process not only helps to preserve their bright green hue but also prepares them for pickling. After blanching, immediately transfer the beans to an ice bath to halt the cooking process. This step is crucial for achieving the desired crunchiness in your dilly beans.
– Crafting the Perfect Pickling Brine: Tips for Success
In a saucepan, combine distilled white vinegar, water, kosher salt, and your choice of spices. Bring the mixture to a boil, stirring until the salt is fully dissolved. This brine is where the magic happens, so feel free to taste and adjust the seasonings to your liking. If you prefer a spicier kick, increase the amount of red pepper flakes.
– Packing the Jars: Ensuring Even Flavor Distribution
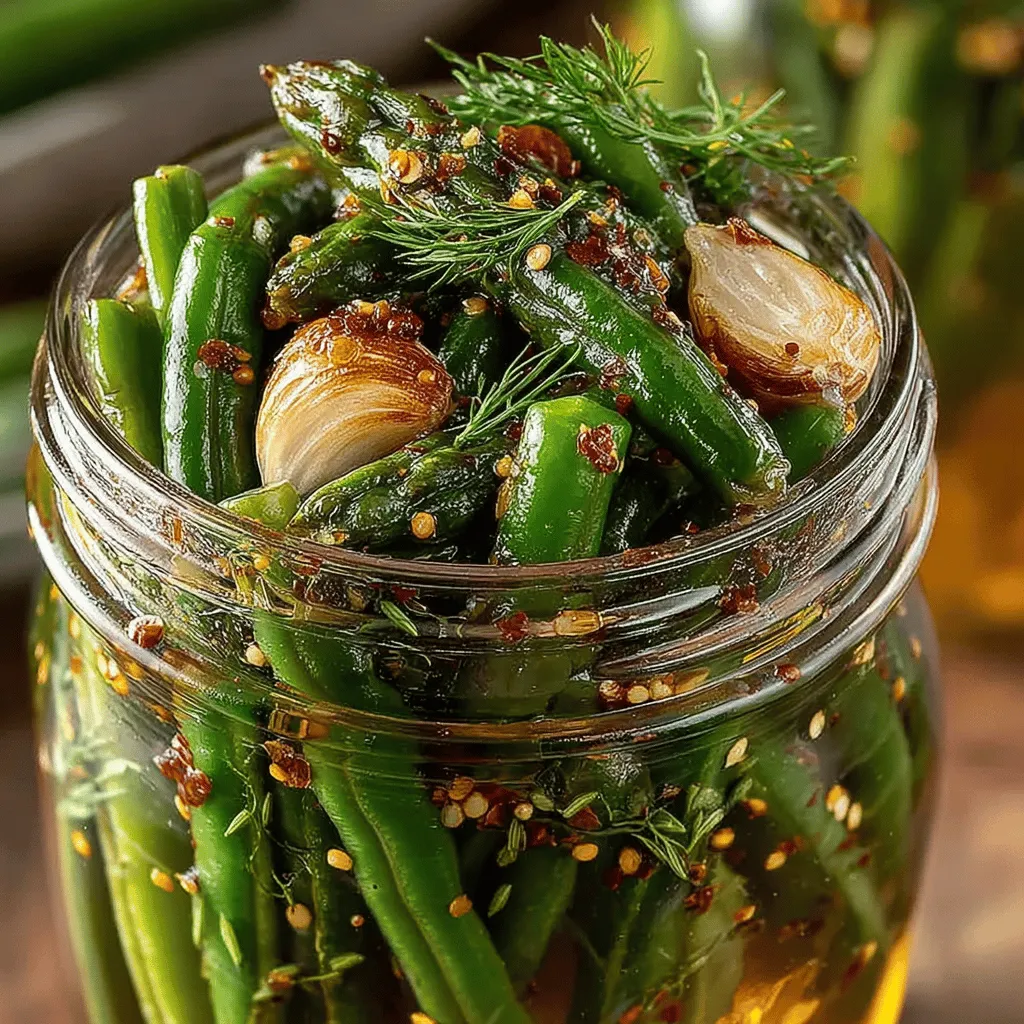
Once the brine is ready, it’s time to pack the jars. Place the prepared green beans upright in sterilized glass jars, leaving about half an inch of headspace. Add garlic cloves and fresh dill (or dill seeds) between the beans for even flavor distribution. Carefully pour the hot pickling brine over the beans, ensuring they are fully submerged. Seal the jars tightly and allow them to cool to room temperature before storing them in the refrigerator.
These first steps set the foundation for your Zesty Crunchy Dilly Beans, ensuring that each bite is packed with flavor and crunch. As you continue through the recipe, you’ll discover just how simple it is to create a deliciously tangy treat that is sure to impress. Whether enjoyed on their own or as a complement to your favorite dishes, these dilly beans are a delightful addition to any meal.
Pouring the Brine: Techniques for Avoiding Spills
Once you’ve prepared your brine and vegetables, it’s time to pour the brine over your Zesty Crunchy Dilly Beans. This step is crucial as it ensures that each bean is perfectly infused with flavor. To avoid spills and make the process as smooth as possible, consider the following techniques:
1. Use a Funnel: A wide-mouth funnel is invaluable when pouring liquids into jars. It helps direct the brine precisely where it needs to go, minimizing the risk of spills.
2. Tilt the Jar: Tilt your jars slightly while pouring the brine. This prevents air bubbles from forming and allows the liquid to flow smoothly over the beans.
3. Pour Slowly: Take your time when pouring the brine. Pouring too quickly can lead to overflowing jars and wasted brine, which you definitely want to avoid.
4. Leave Headspace: Ensure you leave about half an inch of headspace at the top of each jar. This space is essential for the expansion of the liquid and helps in the sealing process.
By employing these techniques, you can efficiently pour the brine while keeping your kitchen clean and organized.
Sealing and Storing: Best Practices for Refrigeration
After pouring the brine over the beans, sealing and storing your jars correctly is essential for maintaining their freshness and flavor. Here are some key practices to follow:
1. Tighten the Lids: Once the jars are filled with brine and beans, securely tighten the lids. Ensure they are not overly tight, as this can create pressure inside the jar, but they should be snug enough to create a seal.
2. Refrigerate Immediately: To preserve the quality of your Zesty Crunchy Dilly Beans, place them in the refrigerator as soon as they are sealed. The cool temperature will help the flavors meld together and keep the beans crisp.
3. Store in a Dark Place: Avoid placing your jars in direct sunlight or near heat sources, as this can affect the pickling process. A cool, dark spot in your refrigerator is ideal.
4. Label Your Jars: If you’re making multiple batches or experimenting with different flavors, label each jar with the date and any flavor variations you’ve made. This will help you keep track of freshness.
By following these best practices for sealing and storing your Zesty Crunchy Dilly Beans, you can enjoy their delightful flavor for weeks to come.
Flavor Variations and Customizations
One of the best aspects of making your own Zesty Crunchy Dilly Beans is the ability to personalize the recipe to suit your taste. Here are some ideas for flavor variations and customizations:
Adjusting Spice Levels: Balancing Heat with Red Pepper Flakes
If you’re a fan of heat, consider adjusting the amount of red pepper flakes in your brine. For a milder flavor, use just a pinch. Conversely, if you desire a more intense bite, feel free to increase the flakes. Remember, it’s easier to add heat than to take it away, so start small and adjust to your preference.
Experimenting with Herbs: Using Thyme, Oregano, or Basil
While dill is the star of this recipe, you can enhance the flavor profile with additional herbs. Thyme, oregano, or basil can add a unique twist to your pickled beans. Try adding a sprig of fresh thyme or a teaspoon of dried oregano to the brine for a new flavor experience.
Adding Sweetness: Alternatives to Granulated Sugar
If you prefer a sweeter pickle, consider alternatives to granulated sugar. Honey, agave syrup, or maple syrup can lend a distinct sweetness that complements the tangy vinegar. Start by substituting half of the sugar in the recipe with your chosen alternative, and adjust to taste.
Incorporating Other Vegetables: Carrots, Cauliflower, and More
Don’t limit yourself to just green beans! Experiment with other vegetables such as sliced carrots, cauliflower florets, or even bell peppers. These additions can create a colorful and flavorful pickled assortment. Just ensure that the vegetables you choose have similar pickling times to maintain their crunch.
Serving Suggestions for Zesty Crunchy Dilly Beans
Your Zesty Crunchy Dilly Beans make a versatile and flavorful addition to numerous dishes. Here are some creative ways to enjoy them beyond just snacking:
As a Tangy Side Dish to Grilled Meats
Zesty Crunchy Dilly Beans serve as an excellent accompaniment to grilled meats. Their bright, tangy flavor cuts through the richness of meats like grilled chicken, pork, or beef. Serve them alongside your favorite barbecue dishes for a refreshing contrast.
Incorporating into Salads and Sandwiches
Chop up your dilly beans and toss them into salads for an extra crunch and zesty flavor. They can also be sliced and added to sandwiches or wraps, providing a delightful tang that enhances the overall flavor profile of your meal.
Using in Charcuterie Boards for Added Flavor
Dilly beans are a fantastic addition to any charcuterie board. Their vibrant color and bold flavor pair beautifully with cured meats, cheeses, and olives. Arrange them alongside other pickled vegetables for a visually appealing and delicious spread.
Storage and Shelf Life of Pickled Dilly Beans
Understanding how to properly store your Zesty Crunchy Dilly Beans is crucial for ensuring their longevity. Here’s what you need to know:
Refrigerator Storage: How Long Can They Last?
When stored in the refrigerator, your Zesty Crunchy Dilly Beans can last for up to 4-6 weeks. The vinegar and salt in the brine act as preservatives, helping to keep the beans fresh and flavorful throughout this period.
Signs of Spoilage to Watch Out For
While pickled foods generally have a long shelf life, it’s essential to be vigilant about spoilage. If you notice any off smells, changes in color, or mold developing on the surface, it’s best to discard the batch. Always trust your senses to guide you in determining the freshness of your dilly beans.
Best Practices for Long-Term Storage
If you want to store your dilly beans for a more extended period, consider canning them using proper canning techniques. This involves sterilizing your jars and sealing them with a water bath method, allowing them to be stored in a cool, dark place for up to a year. However, note that the texture may change slightly over time.
Conclusion: The Delight of Homemade Dilly Beans
Zesty Crunchy Dilly Beans offer a delightful blend of flavors and textures that elevate any meal or snack. By following this simple recipe, you can create a deliciously tangy treat that not only satisfies your taste buds but also connects you to the rich tradition of preserving seasonal vegetables. Enjoy the homemade goodness of these dilly beans, knowing they are fresh, flavorful, and crafted with care.
Whether enjoyed straight from the jar, as part of a creative dish, or shared at gatherings with friends and family, your Zesty Crunchy Dilly Beans are sure to be a hit. Dive into the world of pickling and relish the satisfaction of creating your own unique flavors. Happy pickling!