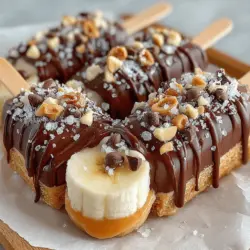
Frozen Peanut Butter Banana Pops: A Deliciously Nutritious Treat
Frozen treats have long been a staple of summer enjoyment, offering a refreshing way to beat the heat while satisfying sweet cravings. As consumers become more health-conscious, the quest for snacks that are both indulgent and nutritious has led to the rise of creative recipes that incorporate wholesome ingredients. One such delightful concoction is the Frozen Peanut Butter Banana Pop. This treat not only embodies the perfect combination of creamy and crunchy textures but also delivers a punch of nutrition that makes it a guilt-free indulgence.
The appeal of Frozen Peanut Butter Banana Pops lies in their simplicity and versatility. With just a few wholesome ingredients, you can whip up this fun snack in no time. Whether you’re looking for a quick pick-me-up after a workout, a delightful dessert for the kids, or a refreshing afternoon treat, these pops are an excellent choice. They provide the energy and nutrients needed to fuel your day without compromising on taste.
Understanding the Ingredients
To create the perfect Frozen Peanut Butter Banana Pops, it’s essential to understand the key ingredients that contribute to their flavor and nutritional profile: bananas, peanut butter, chocolate, and optional garnishes.
Bananas are the star of this recipe. They are naturally sweet, creamy, and rich in potassium, which is crucial for muscle function and heart health. Additionally, bananas contain dietary fiber, which aids in digestion and helps you feel full longer. When selecting bananas for this recipe, it’s vital to choose ripe ones. Ripe bananas not only offer enhanced sweetness but also blend seamlessly with the peanut butter, creating a smooth texture that elevates the overall taste of the pops.
Peanut Butter is the second key ingredient, adding a deliciously nutty flavor along with a boost of protein and healthy fats. This makes the pops more satiating and keeps your energy levels stable. The protein in peanut butter is essential for muscle repair and growth, making these pops an excellent post-workout snack. When selecting peanut butter, look for natural varieties that contain minimal added sugars or oils. This ensures you’re getting all the health benefits without unnecessary additives.
Chocolate plays a significant role in the recipe, providing a rich contrast to the sweetness of the bananas and the nuttiness of the peanut butter. You can choose between dark and milk chocolate, depending on your preference. Dark chocolate is often considered the healthier option since it contains higher levels of antioxidants and less sugar. However, if you prefer the creaminess of milk chocolate, feel free to use it; just be mindful of the added sugar content.
In addition to these main ingredients, you may choose to incorporate optional ingredients such as coconut oil. Coconut oil can be melted and mixed with chocolate to create a smoother coating that adheres well to the banana pops. Additionally, garnishes such as crushed nuts, shredded coconut, or granola can add an appealing crunch and extra flavor to your pops, making them even more enticing.
Step-by-Step Preparation
The preparation of Frozen Peanut Butter Banana Pops is straightforward and can be broken down into a few simple steps. Let’s dive into the process, starting with the bananas.
Preparing the Bananas
The first step in making these delicious pops is to prepare your bananas. It’s important to select bananas that are not only ripe but also firm enough to hold their shape during freezing. A good indicator of ripeness is a banana that has a few brown spots; this indicates that the fruit is sweet and flavorful.
Once you have your ripe bananas, it’s time to cut them. For this recipe, you can choose to slice the bananas into either halves or smaller bite-sized pieces. If you’re opting for halves, simply cut the bananas in half crosswise. For bite-sized pieces, slice each banana into rounds about 1 to 2 inches thick. This size is perfect for snacking and allows for even coating with peanut butter.
Skewering the Bananas
Next, it’s time to skewer the bananas. Using a wooden or reusable skewer, insert it gently into one end of each banana piece. If you’re using banana halves, inserting the skewer lengthwise ensures stability and makes for easy handling. If you’ve opted for smaller pieces, you can insert the skewers into the center of each round.
Be sure to insert the skewer deep enough to provide stability, but not so deep that it pierces through the other end. This will ensure that your banana pops are easy to dip in peanut butter and chocolate without falling apart.
Spreading the Peanut Butter
Now comes the fun part—spreading the peanut butter! Using a butter knife or a small spatula, take a generous amount of peanut butter and spread it evenly over the banana pieces. Aim for a nice, thick layer to maximize flavor and ensure each bite is packed with that rich, nutty goodness.
For those with nut allergies or dietary preferences, feel free to substitute peanut butter with other nut butters, such as almond or cashew butter. These alternatives offer similar health benefits while providing a unique flavor twist.
Once the banana pieces are coated in peanut butter, place them on a baking sheet lined with parchment paper. This will prevent them from sticking and make for easy removal once frozen.
The Freezing Process
After preparing your banana pops and ensuring they are evenly coated in peanut butter, it’s time to freeze them. Place the baking sheet in the freezer for about 1 to 2 hours, or until the bananas are completely frozen. This step is crucial for achieving that refreshing, cold treat texture that makes Frozen Peanut Butter Banana Pops so enjoyable.
As you wait for the bananas to freeze, you can prepare the chocolate coating. Melt your chosen chocolate (either dark or milk) in a microwave-safe bowl, stirring every 30 seconds until fully melted and smooth. If you’re using coconut oil to achieve a thinner consistency, mix it in with the melted chocolate, adjusting the amount based on your desired thickness.
Once the bananas are frozen solid, remove them from the freezer and dip each banana pop into the melted chocolate. Allow any excess chocolate to drip off before placing them back on the parchment-lined baking sheet. If you’d like to add garnishes like crushed nuts or coconut, sprinkle them on immediately after dipping in chocolate, as this will help them adhere better.
Return the chocolate-covered banana pops to the freezer for another 30 minutes to set the chocolate. After this final freezing, your Frozen Peanut Butter Banana Pops will be ready to enjoy!
As you can see, this recipe is not only simple but also allows for customization based on personal taste preferences. Stay tuned for the next part, where we will explore additional tips for serving and storing these delightful treats, ensuring that your Frozen Peanut Butter Banana Pops are a hit all summer long.
The Importance of Freezing for Texture
Freezing is a critical step in the process of making Frozen Peanut Butter Banana Pops. The right freezing technique ensures that the bananas achieve a creamy yet firm texture, which is essential for a satisfying bite. When bananas are frozen, their cellular structure changes, allowing them to become soft and creamy once blended or chewed, rather than icy or hard. This transformation creates a luscious mouthfeel that complements the rich peanut butter and chocolate coating perfectly.
For optimal firmness, it is recommended to freeze the banana pops for at least 2 to 4 hours. This duration allows the bananas to solidify thoroughly, making them easy to handle and coat with chocolate without falling apart. If you leave them in the freezer longer, they will maintain their texture and flavor, ensuring your pops are ready whenever you need a refreshing snack.
Melting the Chocolate
Safe Methods for Melting Chocolate
When it comes to melting chocolate for coating your banana pops, there are two popular methods: the microwave and the double boiler. Each method has its advantages, and your choice may depend on personal preference and convenience.
1. Microwave Method: This quick approach involves placing chocolate chips or chopped chocolate in a microwave-safe bowl. Heat the chocolate in 30-second intervals, stirring in between until it is fully melted. This method is convenient but requires careful monitoring to prevent overheating.
2. Double Boiler Method: This traditional technique involves placing a heatproof bowl over a pot of simmering water. The steam gently melts the chocolate without direct heat, reducing the risk of burning. Stir the chocolate continuously until it melts smoothly.
Importance of Adding Coconut Oil
To achieve a smoother, more fluid chocolate coating, consider adding a teaspoon or two of coconut oil to your melted chocolate. This addition not only enhances the texture, making it easier to coat the banana pops evenly, but it also imparts a subtle coconut flavor that complements the other ingredients beautifully.
Tips for Avoiding Common Pitfalls
When melting chocolate, there are a few common pitfalls to be aware of:
– Avoid Water: Ensure that no water comes into contact with the chocolate, as even a small amount can cause it to seize. Keep your utensils dry and avoid using wet bowls.
– Use Quality Chocolate: Choose high-quality chocolate for the best flavor and texture. Chocolate chips are convenient, but bar chocolate often melts smoother.
– Stir Frequently: Whether using the microwave or double boiler method, stirring frequently helps distribute heat evenly and prevents burning.
Coating and Garnishing the Pops
Techniques for Coating the Frozen Banana Pops
Once your banana pops are adequately frozen and your chocolate is melted, it’s time to coat them. Here’s how to do it effectively:
1. Remove from Freezer: Take the banana pops out of the freezer and let them sit for a minute to soften slightly. This will make it easier to coat them with chocolate.
2. Dip and Swirl: Hold a banana pop by the stick and dip it into the melted chocolate. Use a swirling motion to ensure an even coat. Allow any excess chocolate to drip off before placing the coated pop on a parchment-lined baking sheet.
3. Refrigerate: After coating, place the pops back in the freezer for a few minutes to allow the chocolate to set before garnishing.
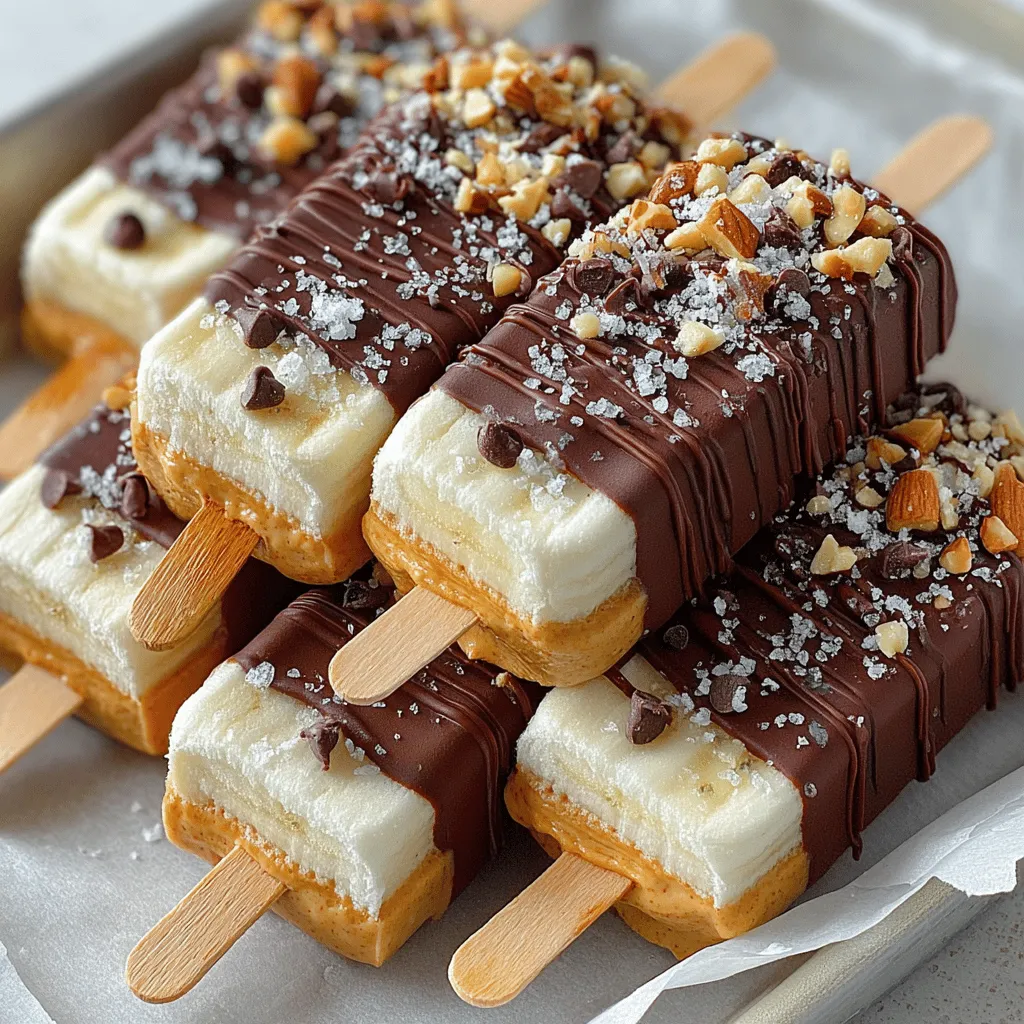
Creative Ideas for Garnishing
To make your Frozen Peanut Butter Banana Pops even more appealing, consider these creative garnishing ideas:
– Chopped Nuts: Sprinkle crushed peanuts, almonds, or walnuts over the chocolate coating for added crunch.
– Mini Chocolate Chips: Press mini chocolate chips into the melted chocolate before it sets for a fun and festive appearance.
– Sprinkles: Colorful sprinkles can add a playful element, making these pops perfect for kids’ parties or gatherings.
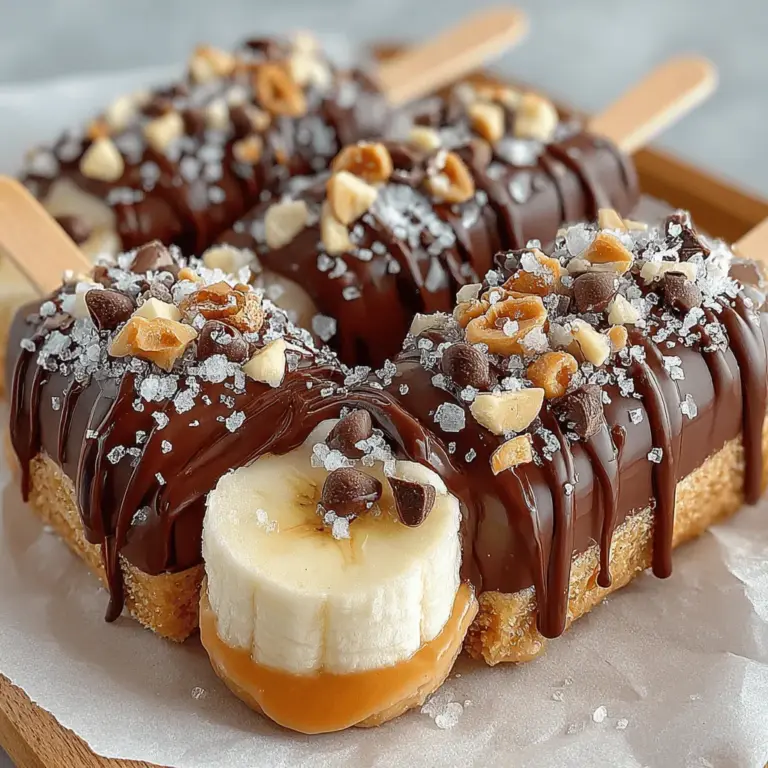
The Impact of Sea Salt
A finishing touch of flaky sea salt can elevate the flavor profile of your pops significantly. The contrast between the sweet chocolate and the salty notes creates a delightful balance, enhancing the overall taste experience. Simply sprinkle a pinch of sea salt over the chocolate-coated pops before they go back into the freezer.
Final Freezing and Serving Suggestions
Importance of a Second Freeze
After coating and garnishing, it’s crucial to place the pops in the freezer for an additional 30 minutes to 1 hour. This second freeze allows the chocolate to harden completely, ensuring that your pops are easy to handle and won’t melt too quickly when served.
Best Practices for Storing the Pops
To keep your Frozen Peanut Butter Banana Pops fresh and prevent freezer burn, follow these best practices for storage:
– Use Airtight Containers: Store the pops in an airtight container lined with parchment paper to avoid sticking and moisture accumulation.
– Wrap Individually: For long-term storage, consider wrapping each pop individually in plastic wrap or aluminum foil.
– Label and Date: If you are making a large batch, label your containers with the date to keep track of freshness. These pops can last up to 2 months in the freezer.
Serving Suggestions
When it comes to serving your Frozen Peanut Butter Banana Pops, presentation can elevate the experience. Here are some ideas for showcasing them at gatherings or as a family snack:
– Pop Stand: Use a styrofoam block or a fruit stand to hold the pops upright, making them easy to grab and enjoy.
– Dessert Platter: Arrange the pops on a decorative platter, alongside fresh fruits or other treats for a colorful dessert spread.
– Individually Wrapped: For parties or events, consider wrapping each pop in colorful wax paper tied with a string for a delightful takeaway treat.
Health Benefits and Dietary Considerations
Frozen Peanut Butter Banana Pops are not just a delicious treat; they also come with several health benefits:
– Low in Added Sugars: The natural sweetness from bananas means you can enjoy these pops with minimal added sugars, making them a healthier alternative to many store-bought ice creams and pops.
– High in Nutrients: Bananas are rich in potassium, fiber, and vitamins, while peanut butter provides protein and healthy fats, making these pops a nutrient-dense snack.
Adaptations for Specific Dietary Needs
This recipe can easily be adapted to suit various dietary needs:
– Vegan Options: Use dairy-free chocolate chips for a vegan-friendly treat. Ensure that the peanut butter is also free from added sugars or dairy.
– Nut-Free Alternatives: Substitute peanut butter with sun butter or soy nut butter for those with nut allergies.
– Paleo and Gluten-Free: The ingredients in this recipe are naturally gluten-free and can fit into a paleo diet when you opt for dark chocolate with minimal ingredients.
Conclusion
Making Frozen Peanut Butter Banana Pops is a joyful and satisfying endeavor that combines the indulgence of chocolate and peanut butter with the health benefits of bananas. This recipe not only serves as a delicious summertime treat but also offers ample opportunity for customization, allowing you to explore different flavors and toppings to suit your palate.
Encouraging experimentation with various toppings—be it nuts, sprinkles, or flavors—can elevate your pops and make them unique to your taste. Whether you’re enjoying them as a snack for yourself or serving them at a gathering, these pops are sure to delight everyone. Dive into this simple recipe and create your own Frozen Peanut Butter Banana Pops today!