
Introduction
Chocolate desserts have an irresistible allure that captivates dessert lovers around the world. The rich, velvety texture and deep, luxurious flavor of chocolate create an experience that is nothing short of heavenly. Among the myriad of chocolate delicacies, chocolate lava cake stands out as a beloved classic, adored for its unique combination of a rich outer cake and a molten, gooey center that oozes decadence with every bite.
Mastering the perfect chocolate lava cake is a rite of passage for home bakers, combining the art of baking with the science of achieving the ideal molten core. Whether you’re preparing for a special occasion or simply indulging in a moment of self-care, learning how to create this show-stopping dessert will elevate your culinary skills and impress your guests.
Understanding Chocolate Lava Cake
Definition and History of Chocolate Lava Cake
Chocolate lava cake, also known as molten chocolate cake or chocolate fondant, is a dessert that features a rich chocolate cake with a liquid center. The history of this delectable treat is somewhat debated, but it is widely believed to have been created in the United States in the late 1980s. The dessert gained immense popularity thanks to renowned chefs such as Jean-Georges Vongerichten, who introduced it to fine dining menus.
This cake is not only a testament to the art of baking but also a delightful surprise for anyone who cuts into it. The moment the fork pierces the outer layer, a warm stream of chocolate flows out, creating a rich and indulgent experience that has made it a staple in both restaurants and home kitchens.
The Science Behind the Gooey Center
The magic of chocolate lava cake lies in its unique baking process. While traditional cakes are baked until fully set, lava cakes are intentionally underbaked, allowing the center to remain molten. The key to achieving this perfect gooey center involves precise timing and temperature control.
As the cake bakes, the outer edges firm up while the center remains fluid due to the combination of high-quality chocolate and eggs. The chocolate’s melting point, combined with the proteins in the eggs, creates a delicate balance that is essential to the success of this dessert. When done correctly, the results are nothing short of spectacular.
Variations of Lava Cake Around the World
While the classic chocolate lava cake reigns supreme, variations of this dessert can be found around the globe. Some bakers experiment with different types of chocolate, such as white chocolate or flavored chocolate, to create unique versions. Others incorporate ingredients like caramel, peanut butter, or fruit purees to enhance the flavor profile.
In France, you might encounter a similar dessert called “moelleux au chocolat,” which translates to “chocolate softness.” This dish features the same molten core and is often served with a scoop of ice cream or a dollop of crème fraîche. No matter the variation, the essence of chocolate lava cake remains—an indulgent treat that delights the senses.
Key Ingredients for Perfect Chocolate Lava Cake
Creating the ultimate chocolate lava cake starts with selecting the right ingredients. Each component plays a vital role in achieving the desired texture and flavor.
High-Quality Chocolate: The Role of Dark Chocolate
The backbone of any chocolate dessert is, of course, chocolate itself. For lava cake, high-quality dark chocolate is essential. Look for chocolate with a cocoa content of at least 60% to ensure a rich flavor without overwhelming sweetness. The dark chocolate provides depth to the cake and contributes to the luxurious molten center.
Unsalted Butter: Importance in Texture and Flavor
Unsalted butter is the preferred choice for baking because it allows for better control over the salt content in your recipe. The butter not only contributes to the cake’s flavor but also enhances its texture, making it rich and moist. Be sure to use high-quality butter for the best results.
Eggs and Egg Yolks: Their Contribution to the Cake Structure
Eggs are a crucial component in any cake recipe, and chocolate lava cake is no exception. Both whole eggs and additional egg yolks provide structure and stability to the cake. The proteins in the eggs help the cake rise while keeping the center gooey. Using extra yolks also enriches the flavor and adds a custard-like quality to the molten center.
Sugar: Balancing Sweetness and Richness
Sugar not only sweetens the cake but also plays a role in its texture. Granulated sugar is commonly used in lava cake recipes, and it helps to create a tender crumb. The right amount of sugar balances the bitterness of the dark chocolate, enhancing the overall flavor profile.
Flour: The Right Type for the Best Results
When it comes to flour, all-purpose flour is typically used in chocolate lava cake recipes. The small amount of flour added helps to provide structure while allowing the center to remain molten. Be cautious not to overmix the batter, as this can lead to a denser texture.
Optional Flavorings: Vanilla, Espresso, and Sea Salt
While chocolate is the star of this dessert, you can elevate the flavor with optional additions. A splash of vanilla extract enhances the overall taste, while a touch of espresso powder can intensify the chocolate flavor without making the cake taste like coffee. A sprinkle of sea salt on top before serving can also enhance the sweetness and create a delightful contrast.
Essential Tools and Equipment
Before diving into the baking process, it’s important to gather the essential tools and equipment needed to create the perfect chocolate lava cake. Having the right tools on hand ensures a smoother baking experience and better results.
Bakeware: Perfect Ramekins for Individual Servings
Chocolate lava cake is traditionally baked in individual ramekins, which allow for portion control and presentation. Choose ramekins that are oven-safe and have a capacity of about 6 ounces. This size ensures that the cake bakes evenly while providing enough space for a molten center.
Mixing Bowls: Choosing the Right Material and Size
Having a set of mixing bowls in various sizes is essential for any baking endeavor. Opt for glass or stainless steel bowls, which are durable and easy to clean. A medium-sized bowl is ideal for mixing the batter, while a smaller bowl can be used for melting chocolate and butter.
Electric Mixer vs. Whisk: Pros and Cons
When it comes to mixing your cake batter, you can choose between using an electric mixer or a hand whisk. An electric mixer is quicker and more efficient, especially for incorporating air into the batter. However, a whisk can give you better control over the mixing process and is perfect for small batches. Choose the method that you are most comfortable with.
Oven Thermometer: Ensuring Accurate Baking Temperatures
To achieve the perfect lava cake, precise temperature control is crucial. An oven thermometer can help you verify that your oven is at the right temperature, as many ovens can be off by several degrees. Baking at the correct temperature is essential for achieving that gooey center.
Cooling Rack: Importance for Presentation
Once your lava cakes are baked, allowing them to cool slightly on a cooling rack is important. This step helps to set the cakes and makes it easier to remove them from the ramekins without breaking. A cooling rack also ensures that the cakes do not continue to cook in residual heat, preserving that perfect molten center.
Step-by-Step Instructions for Baking Chocolate Lava Cake
Now that you’re familiar with the ingredients and tools, it’s time to dive into the step-by-step instructions for baking chocolate lava cake. Follow these guidelines carefully to ensure a successful outcome.
Preparing the Oven: Preheating and Proper Temperature Settings
Start by preheating your oven to 425°F (220°C). This high temperature is essential for creating that perfect outer crust while keeping the center deliciously molten. Make sure to give your oven ample time to reach the desired temperature before placing your cakes inside.
Melting Chocolate and Butter: Techniques for a Smooth Mix
In a medium heatproof bowl, combine the high-quality dark chocolate and unsalted butter. There are two effective methods for melting chocolate: the double boiler method or the microwave method.
Double Boiler Method: Place the bowl over a pot of simmering water, ensuring that the bottom of the bowl does not touch the water. Stir occasionally until the chocolate and butter are completely melted and smooth.
Microwave Method: If you prefer a quicker approach, you can melt the chocolate and butter in the microwave. Place the bowl in the microwave and heat in short intervals of 20-30 seconds, stirring in between until fully melted. Be cautious not to overheat, as chocolate can burn easily.
Once melted, set the chocolate-butter mixture aside to cool slightly before proceeding to the next steps.
As you prepare to continue, be ready to blend this rich chocolate mixture with the other ingredients, creating a decadent batter that will soon transform into a glorious chocolate lava cake.
Stay tuned for the next part, where we will delve deeper into the remaining steps, baking tips, and additional insights to ensure your chocolate lava cake is nothing short of perfection.
Mixing the Batter: Incorporating Eggs and Sugar
The foundation of your spiced pumpkin pie overnight oats begins with the perfect blend of eggs and sugar. For this recipe, you will want to use large eggs, preferably at room temperature. This ensures better incorporation into your oat mixture, resulting in a smoother texture. Start by cracking two large eggs into a mixing bowl. Whisk them gently until the yolks and whites are fully combined.
Next, gradually add in the sugar, which can be either granulated or brown sugar, depending on your preference. Brown sugar will impart a deeper, caramel-like flavor, complementing the spices beautifully. Whisk the eggs and sugar together until the mixture becomes pale and slightly frothy—this should take about 2-3 minutes. This step is crucial as it incorporates air into the batter, leading to a fluffier overnight oat experience.
Pouring and Preparing Ramekins: Ensuring Easy Release
Once your egg and sugar mixture is ready, it’s time to prepare your ramekins. You will want to use six to eight individual ramekins for this recipe, which will help in portion control and make serving easier. Before pouring in your batter, you need to ensure that the ramekins are well-greased. Use a non-stick cooking spray or a light layer of butter to coat the insides thoroughly. This will prevent the oats from sticking to the sides after baking, allowing for an easy release.
After greasing, take a moment to dust the inside of each ramekin with a little flour or cocoa powder—this additional step enhances the non-stick effect and adds flavor. Then, pour the batter into each ramekin, filling them about three-quarters full to allow space for the oats to rise during baking.
Baking Time: Finding the Ideal Time for That Molten Center
Preheat your oven to 350°F (175°C). Once the oven reaches the desired temperature, place the filled ramekins on a baking sheet for easy handling. Bake them for about 12-15 minutes. However, baking time can vary depending on your oven, so keep a close eye on them. The goal is to achieve a set outer layer while maintaining a molten center.
You will know they are ready when the edges are firm, but the center still jiggles slightly when you gently shake the ramekin. This is crucial; overbaking will lead to a fully set center, losing that delectable gooey texture that defines a perfect spiced pumpkin pie overnight oat.
Cooling and Serving: Best Practices for Presentation
After baking, remove the ramekins from the oven and allow them to cool for a few minutes. This cooling period not only helps in the setting process but also makes them easier to handle. To serve, gently run a knife around the edges of each ramekin to loosen the oats. Then, carefully invert each ramekin onto a plate. They should come out easily if you properly greased and floured them.
Serving Suggestions and Pairings
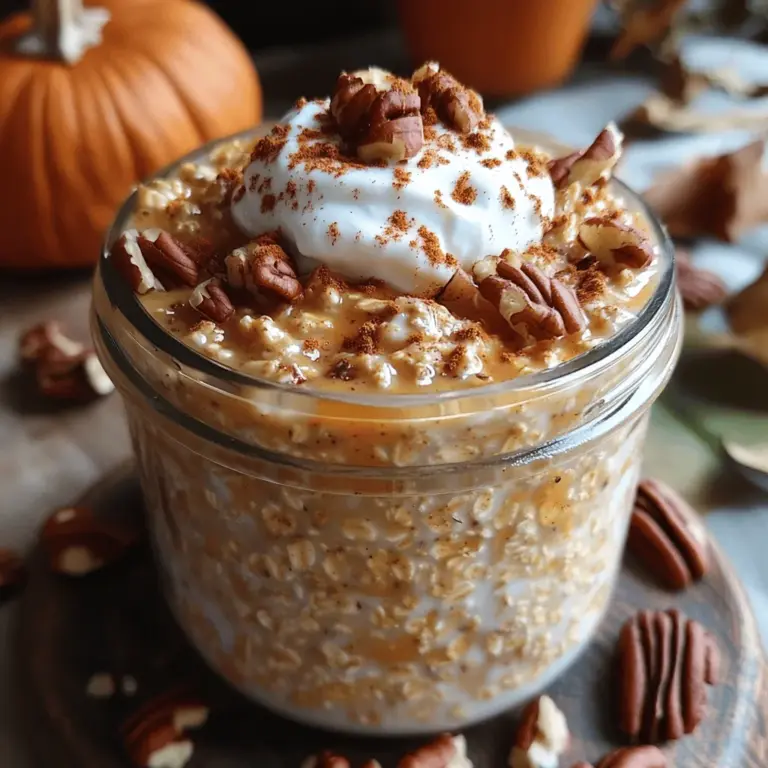
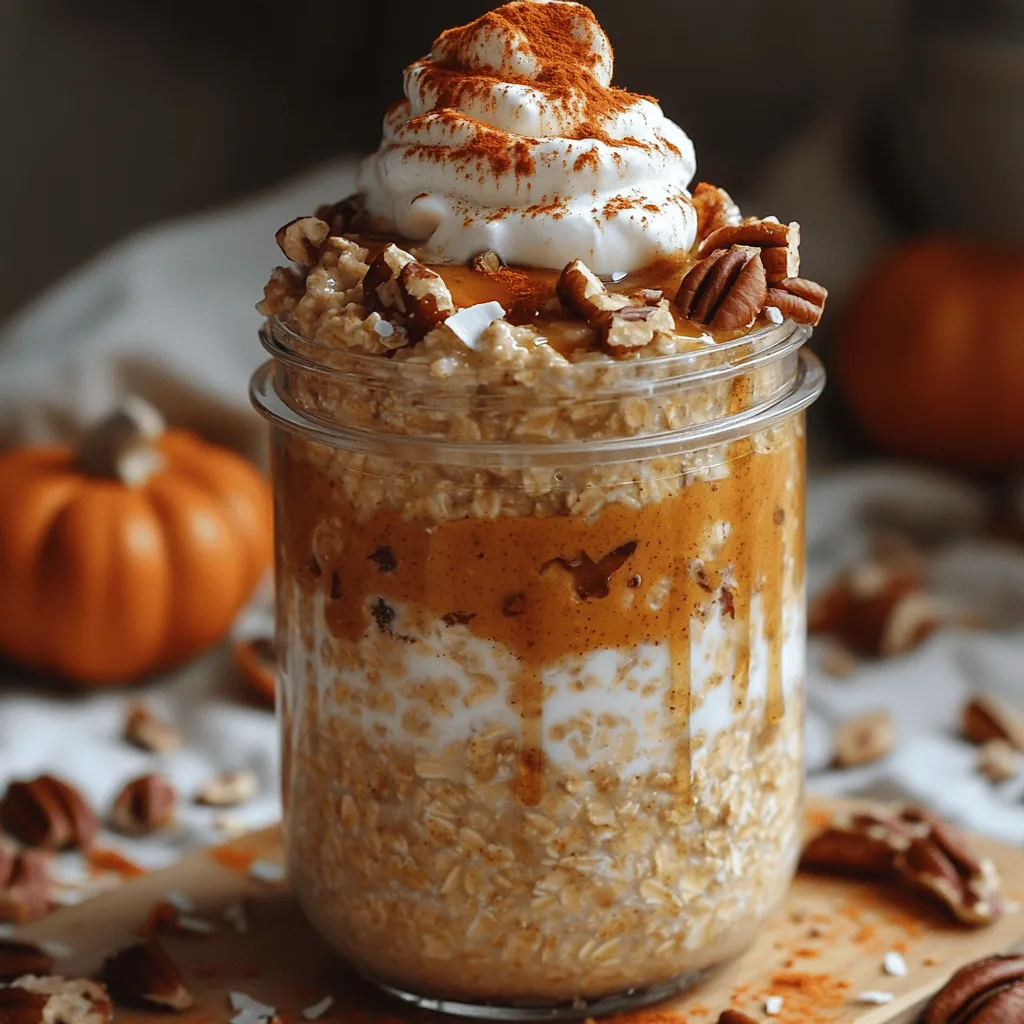
Plating the Lava Cake: Techniques for an Elegant Presentation
Presentation is key when serving your spiced pumpkin pie overnight oats. Start by inverting each ramekin onto a dessert plate for that coveted “lava cake” look. To elevate your presentation, dust the top with powdered sugar or a sprinkle of cinnamon. You can also use a spoon to create a gentle swirl of whipped cream on the side, which adds a delightful contrast to the warm oats.
Complementary Sides: Ice Cream, Whipped Cream, and Fresh Berries
While these oats are delicious on their own, pairing them with complementary sides can enhance the experience. A scoop of vanilla ice cream or dollop of whipped cream atop the warm oats creates a beautiful contrast in temperature and texture. Adding fresh berries, such as raspberries or blueberries, not only adds a pop of color but also a burst of freshness that balances the richness of the dish.
Beverage Pairings: Wines, Coffee, and Dessert Drinks
To complete your dessert experience, consider what to sip alongside your spiced pumpkin pie overnight oats. A glass of dessert wine, such as a late harvest Riesling or a sweet Moscato, will harmonize beautifully with the flavors of cinnamon and nutmeg. If you prefer a non-alcoholic option, a warm cup of spiced chai or a rich coffee can complement the spices in the oats effectively.
Common Mistakes to Avoid
Overbaking: Understanding the Signs of Perfect Doneness
One of the most common mistakes when making spiced pumpkin pie overnight oats is overbaking. Remember, the key to achieving that molten center is to bake just until the edges have set, and the center remains slightly jiggly. If you notice that the tops are browning too much, it’s a sign that they may be overbaked.
Underbaking: The Risks of Too Much Gooeyness
While you want a gooey center, be cautious not to underbake your oats. If you remove them from the oven too soon, they may collapse or become overly runny, which can lead to a less enjoyable texture. Make sure to follow the suggested baking time and check for doneness carefully.
Ingredient Substitutions: What Works and What Doesn’t
When it comes to ingredient substitutions, it’s essential to know what works. While you can swap out granulated sugar for brown sugar, be cautious with other replacements. For instance, using egg substitutes may alter the texture, so ensure that any alternatives you choose are suited for baking. If you are looking for a gluten-free option, make sure your oats are labeled as gluten-free, as cross-contamination can occur with regular oats.
Storing Leftovers: Tips for Keeping Lava Cake Fresh
If you have leftovers, storing them correctly is crucial. Allow the spiced pumpkin pie overnight oats to cool completely before covering them with plastic wrap or transferring them to an airtight container. They can be refrigerated for up to 3 days. When ready to serve, reheat them in the microwave for a few seconds to restore their warmth.
Exploring Variations on the Classic Recipe
Gluten-Free Chocolate Lava Cake: Adapting the Recipe for Dietary Preferences
For those with gluten sensitivities, adapting this recipe is simple. Use gluten-free oats and ensure that the remaining ingredients are also gluten-free. This way, you can enjoy the same rich flavors without compromising your dietary needs.
Vegan Options: Substituting Ingredients for a Plant-Based Version
To create a vegan version of spiced pumpkin pie overnight oats, replace eggs with flaxseed meal mixed with water or a commercial egg replacer. Use plant-based milk, such as almond or coconut milk, to maintain creaminess. Adjust the sugar as needed, and watch the baking time carefully, as vegan versions may require slightly different timing.
Flavor Variations: Adding Spices, Fruit, or Nuts for Unique Twists
Get creative and add a twist to your basic recipe! Incorporate spices such as cardamom or ginger for additional warmth. You can also mix in chopped nuts for a crunchy texture or even swirl in a spoonful of nut butter before baking for a creamy surprise. Diced apples or pears can add a lovely fruity dimension that pairs well with the pumpkin base.
The Joy of Baking Chocolate Lava Cake
Baking spiced pumpkin pie overnight oats isn’t just about creating a delicious treat; it’s about the experience and joy it brings. Many bakers have a special connection to this recipe, often recalling the first time they made it for family gatherings or holiday celebrations. The delight of sharing such a comforting and indulgent dessert can create lasting memories.
Whether it’s a cozy family dinner or a festive celebration, serving these spiced oats brings joy not only to the baker but also to those who indulge in them. There’s something magical about watching friends and family enjoy the fruits of your labor, their faces lighting up with the first bite, and sharing stories around the table.
Conclusion
Mastering the art of baking spiced pumpkin pie overnight oats is a rewarding culinary endeavor. Not only do you get to enjoy a rich, flavorful dessert, but you also have the freedom to experiment with variations that suit your taste and dietary needs. The joy of baking extends beyond the kitchen; it’s about creating moments of connection with those you love.
So, gather your ingredients, follow the steps, and don’t hesitate to make this recipe your own. Whether you stick to the classic version or explore new flavor profiles, the journey of baking will continue to bring joy and delight in every bite. Happy baking!
