
Choco-Toffee Bliss Bars Recipe
Introduction
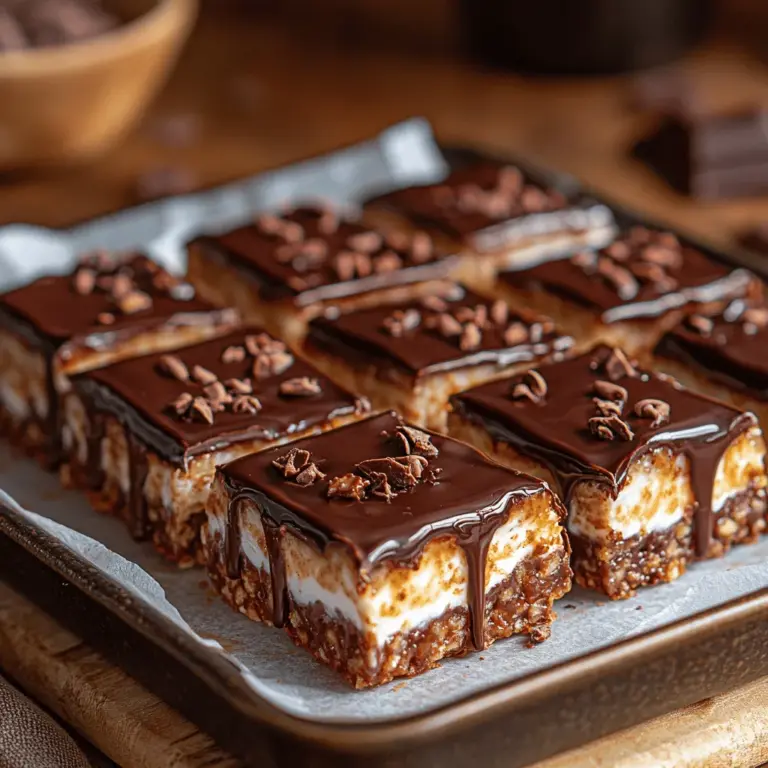
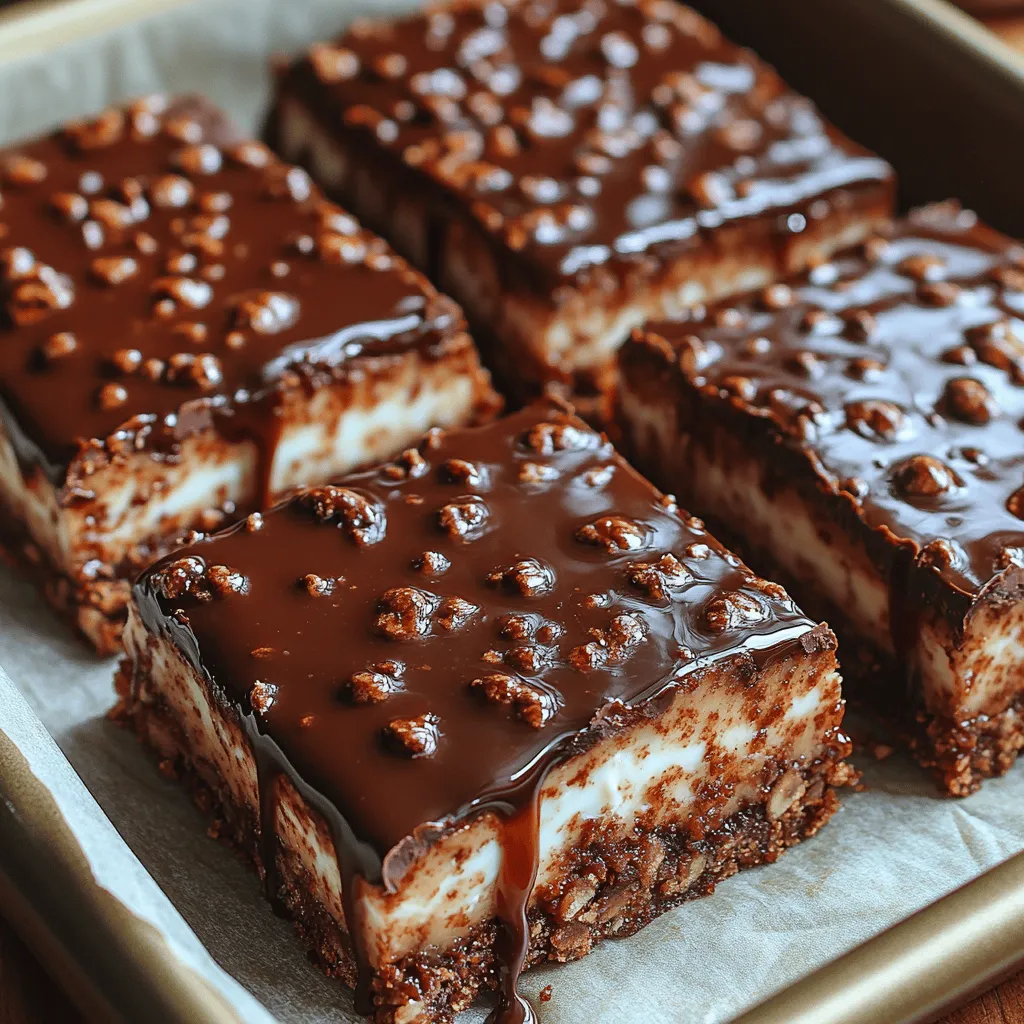
Choco-Toffee Bliss Bars are the ultimate guilt-free indulgence that perfectly balances rich flavors and wholesome ingredients. These delectable treats combine creamy Greek yogurt, crunchy toffee bits, and luscious chocolate, resulting in a dessert that is both satisfying and nutritious. Ideal for gatherings, parties, or a delightful afternoon snack, these bars cater to those who want to enjoy a sweet treat without compromising their health goals.
What sets Choco-Toffee Bliss Bars apart is their unique blend of ingredients that not only elevate their taste but also add nutritional benefits. The interplay of creamy yogurt, sweet toffee, and rich chocolate creates a flavor profile that is irresistible. Whether you’re hosting a get-together or simply treating yourself, these bars are easy to make and sure to impress.
Understanding the Ingredients
To truly appreciate the Choco-Toffee Bliss Bars, it’s essential to delve into each ingredient and understand its role in the recipe, especially focusing on the health benefits and flavor contributions.
Greek Yogurt: A Creamy Base with Health Benefits
At the heart of these bliss bars is Greek yogurt, a versatile ingredient celebrated for its creamy texture and health benefits. Greek yogurt is an excellent source of protein, calcium, and probiotics, making it a nutritious choice that promotes gut health. The high protein content helps keep you full longer, which is particularly beneficial when you’re looking for a healthier dessert option.
When selecting Greek yogurt, you have a choice between full-fat and low-fat options. Full-fat yogurt provides a richer, creamier texture, which can enhance the overall mouthfeel of the bars. Conversely, low-fat Greek yogurt is a lighter option that still maintains a good level of creaminess. Depending on your dietary preferences, you may choose either option, but keep in mind that the fat content can affect the overall flavor and texture of the dessert.
Sweeteners: Honey vs. Maple Syrup
The sweetness of Choco-Toffee Bliss Bars comes from the choice of sweeteners, typically honey or maple syrup. Both options offer their own unique flavor profiles. Honey brings a floral sweetness that pairs beautifully with the tanginess of yogurt, while maple syrup offers a rich, caramel-like flavor that complements the toffee bits.
From a nutritional standpoint, honey has a slightly lower glycemic index than regular sugar, making it a more favorable option for those monitoring their blood sugar levels. Maple syrup, on the other hand, is rich in antioxidants and minerals, contributing to its appeal. The choice between these two sweeteners ultimately comes down to personal preference, but both can enhance the natural flavors of the bars.
Toffee Bits: Texture and Flavor Enhancement
Toffee bits are a standout ingredient in Choco-Toffee Bliss Bars, adding a delightful crunch and a burst of sweetness. These small pieces of toffee are made from butter, sugar, and sometimes a touch of salt, resulting in a caramelized flavor that perfectly complements the chocolate and yogurt layers. The contrast between the creamy yogurt and the crunchy toffee bits creates an inviting texture that is hard to resist.
When selecting toffee bits, look for high-quality brands that use natural ingredients. The flavor and texture of the toffee will significantly influence the overall outcome of your bliss bars, so it’s worth investing in a good product.
The Importance of Chocolate Quality
The chocolate topping is another critical component of Choco-Toffee Bliss Bars. The quality of chocolate can elevate a dessert from good to extraordinary. Semi-sweet chocolate is a popular choice for its balanced sweetness, making it ideal for those who enjoy a moderate chocolate flavor. Dark chocolate, with its higher cocoa content, offers a more intense taste and a wealth of antioxidants, making it a great choice for health-conscious individuals.
When choosing chocolate, opt for products with a higher cocoa percentage for a richer flavor and less sugar. Whether you prefer semi-sweet or dark chocolate, ensure that the chocolate you use is of high quality to enhance the overall taste of your bliss bars.
Step-by-Step Guide to Making Choco-Toffee Bliss Bars
Now that we’ve covered the essential ingredients, it’s time to dive into the step-by-step process of creating your Choco-Toffee Bliss Bars. This section will guide you through the initial stages of preparation, focusing on the yogurt layer and toffee layer.
Preparing the Yogurt Layer
1. Gather Your Ingredients: Start by assembling all the necessary ingredients for the yogurt layer. You will need Greek yogurt, your choice of sweetener (honey or maple syrup), and vanilla extract.
2. Mixing the Yogurt: In a mixing bowl, combine the Greek yogurt with your chosen sweetener. If you’re using honey, make sure it is at room temperature for easier mixing. Add a splash of vanilla extract for depth of flavor.
3. Achieving the Right Consistency: Use a whisk or electric mixer to blend the ingredients until smooth and creamy. Pay attention to the texture; it should be thick yet spreadable. If you find the mixture too thick, you can add a tablespoon of milk (dairy or non-dairy) to achieve the desired consistency.
4. Taste Testing: Before proceeding, take a moment to taste the yogurt mixture. Adjust the sweetness as necessary by adding more honey or maple syrup if you prefer a sweeter flavor. This step is crucial, as it allows you to balance the tartness of the yogurt with the sweetness from the sweeteners.
5. Layering in the Pan: Once your yogurt layer is ready, prepare an 8×8 inch baking dish by lining it with parchment paper for easy removal later. Pour the yogurt mixture into the dish and spread it evenly across the bottom, smoothing it out with a spatula. This layer serves as the creamy foundation for your bliss bars.
Creating the Toffee Layer
1. Prepare the Toffee Bits: While the yogurt layer sets, gather your toffee bits. If you prefer larger pieces, you can chop them slightly for a more pronounced crunch in the bars.
2. Sprinkling the Toffee: Once the yogurt layer is even, sprinkle the toffee bits generously over the top. The amount of toffee can be adjusted based on personal preference, but a good rule of thumb is to cover the surface evenly for a well-rounded flavor in every bite.
3. Melt the Chocolate: Next, it’s time to prepare the chocolate topping. In a microwave-safe bowl, add your choice of semi-sweet or dark chocolate chips. Heat the chocolate in the microwave in 20-second intervals, stirring in between, until it is fully melted and smooth. Be cautious not to overheat, as chocolate can burn easily.
4. Pouring the Chocolate: Once melted, pour the chocolate over the toffee bits and yogurt layer, using a spatula to spread it evenly across the surface. This layer not only adds flavor but also creates a beautiful glossy finish that makes the bars visually appealing.
5. Chill the Bars: After layering, cover the baking dish with plastic wrap and place it in the refrigerator. Allow the bars to chill for at least two hours, or until the chocolate has set completely. This step is critical, as it helps the layers meld together and makes cutting the bars easier.
By following these initial steps, you’re well on your way to creating Choco-Toffee Bliss Bars that are not only delicious but also a healthier alternative to traditional desserts. Keep an eye out for the next part of this guide, where we’ll explore the finishing touches and ways to serve these delightful bars.
Step-by-Step on Making Homemade Toffee
Creating the perfect homemade toffee is key to achieving the ideal texture and flavor for your Choco-Toffee Bliss Bars. Follow these simple steps to ensure your toffee comes out perfectly every time:
Ingredients for Homemade Toffee
– 1 cup unsalted butter
– 1 cup granulated sugar
– 1/4 cup light corn syrup
– 1/4 teaspoon salt
– 1 teaspoon vanilla extract
Instructions for Making Toffee
1. Prep Your Workspace: Start by lining an 8×8 inch baking pan with parchment paper, allowing some overhang for easy removal later. This will ensure your toffee can be easily lifted out and cut into bars.
2. Combine Ingredients: In a heavy-bottomed saucepan, combine the butter, sugar, corn syrup, and salt. Stir the mixture over medium heat until the butter melts and the sugar dissolves.
3. Cook to Temperature: Increase the heat to medium-high and bring the mixture to a boil. Do not stir; instead, use a pastry brush dipped in water to wash down any sugar crystals from the sides of the pan. This helps to prevent crystallization.
4. Monitor the Temperature: Use a candy thermometer to monitor the temperature of the toffee. You want to cook it until it reaches the hard crack stage, which is about 300°F (149°C). This process usually takes around 10-15 minutes. Keep an eye on it; the color will gradually turn a lovely golden brown.
5. Add Vanilla: Once the toffee reaches the desired temperature, remove it from the heat and stir in the vanilla extract. Be cautious as it may bubble up.
6. Pour the Toffee: Quickly pour the toffee into the prepared baking pan. Tilt the pan gently to spread the toffee evenly, but do not use a spatula, as this can cause it to cool too quickly and become grainy.
Tips for Avoiding Burning and Achieving the Right Consistency
– Use a Heavy-Bottomed Pan: A heavy-bottomed pan distributes heat evenly and helps prevent hot spots that can lead to burning.
– Watch Closely: Toffee can go from perfect to burnt in seconds, so make sure to monitor it closely, especially as it approaches the hard crack stage.
– Use a Candy Thermometer: Accuracy is crucial. A candy thermometer ensures you hit the right temperature consistently.
Adding the Chocolate Topping
Once your toffee has cooled completely, it’s time to add the chocolate topping.
Instructions for Melting Chocolate with Coconut Oil
1. Choose Your Chocolate: Select high-quality chocolate chips or a chocolate bar (milk, dark, or semi-sweet) according to your preference. Using chocolate with a higher cocoa content can add depth to the flavor.
2. Melt the Chocolate: In a microwave-safe bowl, combine 1 cup of chocolate chips with 1 tablespoon of coconut oil. Microwave for 30-second intervals, stirring in between, until completely melted and smooth. The coconut oil adds a glossy finish and helps the chocolate set nicely.
3. Pour Over Toffee: Once melted, pour the chocolate mixture over the cooled toffee layer. Utilize a spatula to spread it evenly across the surface.
4. Cool and Set: Allow the chocolate to cool at room temperature, and then refrigerate for about 30 minutes to set completely.
The Importance of Cooling Before Pouring onto the Toffee
Cooling your toffee is crucial before adding chocolate. If the toffee is still warm when you pour on the chocolate, it could melt the chocolate, leading to a marbled effect instead of a clean layer. For the best results, ensure your toffee is completely set and cool to the touch.
Tips for Perfecting Your Choco-Toffee Bliss Bars
Suggested Variations for Flavor Enhancements
– Flavor Infusions: Consider adding a pinch of sea salt to the toffee mixture for a salted caramel flavor. Alternatively, a splash of coffee extract can provide a delightful twist.
– Experiment with Chocolate: Try using white chocolate for a sweeter version or dark chocolate for a richer taste.
Adding Nuts or Sea Salt for an Extra Crunch
– Nuts: Chopped nuts such as pecans, walnuts, or almonds can be sprinkled over the chocolate layer before it sets. This adds texture and a nutty flavor that complements the sweetness of the toffee.
– Sea Salt: A light sprinkle of flaky sea salt on top of the chocolate enhances the flavor and adds a sophisticated touch to your bars.
Storing and Freezing Tips for Longevity
– Storage: Store your Choco-Toffee Bliss Bars in an airtight container at room temperature for up to a week. If you live in a warmer climate, consider refrigerating them to prevent melting.
– Freezing: For longer storage, you can freeze the bars. Wrap them tightly in plastic wrap and then place them in a freezer-safe container. They will last for up to three months. When ready to enjoy, thaw them in the fridge overnight before serving.
Serving Suggestions: Pairings with Fruits or Coffee
These bliss bars make an excellent treat for any occasion. Serve them alongside fresh fruit, such as strawberries or raspberries, for a refreshing contrast. Additionally, they pair beautifully with a cup of coffee or tea—perfect for an afternoon snack or dessert.
Health Considerations and Nutritional Information
Breakdown of Calories and Nutritional Content per Serving
One serving of Choco-Toffee Bliss Bars (approximately 1 square) contains about:
– Calories: 200
– Total Fat: 12g
– Saturated Fat: 7g
– Cholesterol: 20mg
– Sodium: 50mg
– Total Carbohydrates: 24g
– Dietary Fiber: 1g
– Sugars: 18g
– Protein: 2g
Discuss How These Bars Fit into a Balanced Diet
While these bars are rich in sweetness and indulgence, they can certainly fit into a balanced diet when consumed in moderation. Enjoy them as a treat after a meal or as a special dessert for gatherings. Balancing these with healthier options throughout the day will allow you to savor their rich flavor without compromising your dietary goals.
Comparison of Homemade vs. Store-Bought Dessert Options
Homemade Choco-Toffee Bliss Bars offer the advantage of knowing exactly what ingredients you are using. Unlike many store-bought options laden with preservatives and artificial flavors, these bars are made from wholesome ingredients. Additionally, you can customize them to suit your dietary preferences, making them a superior choice for dessert lovers.
Conclusion
Making your own Choco-Toffee Bliss Bars is not only a rewarding experience but also a delightful way to indulge in a sweet treat that can be easily shared with friends and family. The joy of crafting these bars from scratch, coupled with the satisfaction of watching them disappear at gatherings, makes it all worthwhile.
Remember, the versatility of the ingredients allows for endless customization to cater to your taste preferences. Whether you choose to stick to the classic recipe or try out variations, your Choco-Toffee Bliss Bars are sure to impress. So gather your ingredients, follow the steps, and savor the deliciousness of your creation. Don’t forget to share your results and experiences with loved ones, as these bars are meant to be enjoyed together!
