Title: Refreshing Watermelon Kiwi Layered Pops: A Vibrant Summer Delight
Introduction
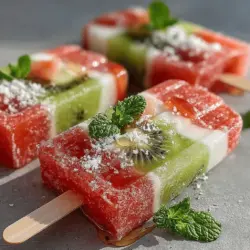
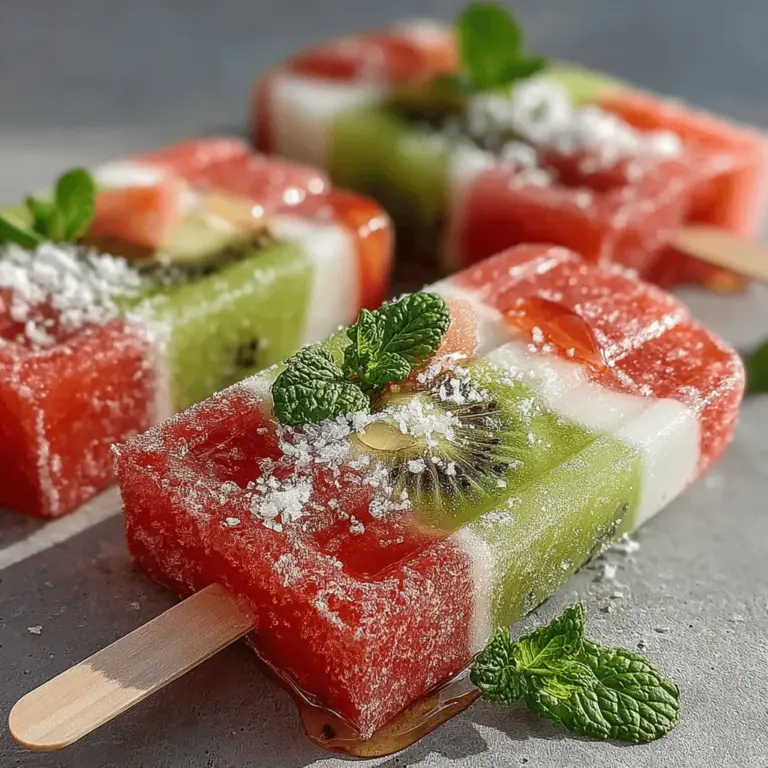
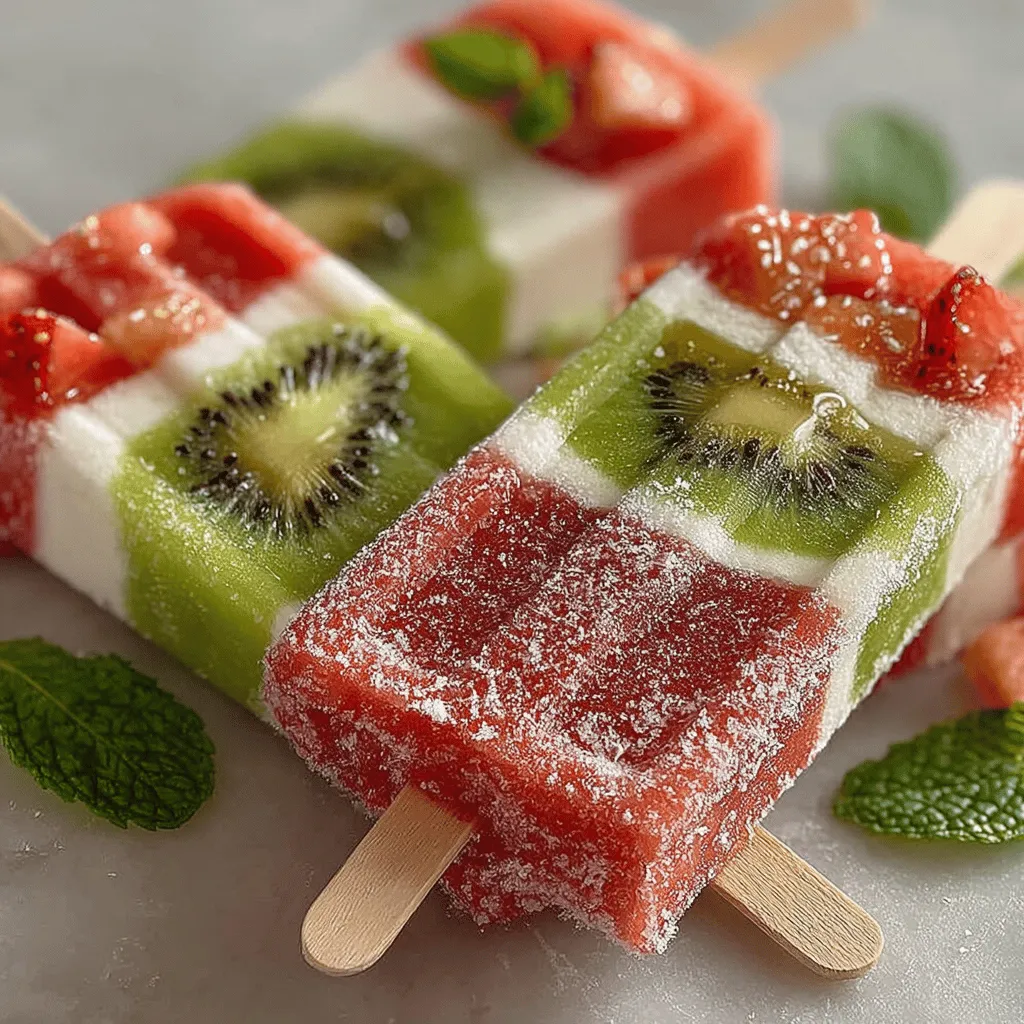
As the summer sun blazes down, nothing beats the heat quite like a refreshing popsicle. These delightful frozen treats not only bring a sense of nostalgia but also provide a delicious way to cool off while indulging in something sweet. Among the myriad of popsicle recipes available, Watermelon Kiwi Layered Pops stand out, showcasing vibrant colors and tantalizing flavors that appeal to both kids and adults alike.
Homemade popsicles are a fun and creative way to enjoy fresh ingredients, allowing you to control the flavors and sweetness while avoiding preservatives and artificial additives found in store-bought options. The Watermelon Kiwi Layered Pops burst with natural sweetness and a refreshing tang, making them the perfect summer snack. With their eye-catching layers and combination of juicy watermelon and zesty kiwi, these pops are as visually appealing as they are delicious, making them a hit at summer gatherings, birthday parties, or simply as a cool treat on a hot day.
Understanding the Ingredients
To create the perfect Watermelon Kiwi Layered Pops, it’s essential to understand the key ingredients that not only contribute to their delicious taste but also enhance their nutritional profile. Let’s delve into each component, exploring their health benefits and flavor contributions.
Watermelon Layer
Watermelon is the star of the first layer in these popsicles. This refreshing fruit is not only a summertime favorite but also boasts numerous health benefits. Renowned for its high water content—over 90%—watermelon is a fantastic way to stay hydrated during the sweltering summer months. In addition to hydration, watermelon is low in calories, making it an excellent option for those looking to enjoy a guilt-free treat.
The natural sweetness of watermelon is further enhanced by the addition of honey or agave syrup. These natural sweeteners elevate the flavor profile without overpowering the fruit’s inherent taste. Honey, known for its antibacterial properties and potential antioxidant benefits, provides a smooth sweetness, while agave syrup offers a lower glycemic index alternative, making it a suitable choice for those monitoring their sugar intake.
To bring a zesty balance to the sweetness of the watermelon, a splash of lime juice is included. This bright, citrusy note enhances the overall flavor and adds a refreshing twist that perfectly complements the sweetness and juiciness of the watermelon.
Kiwi Layer
The second layer of our Watermelon Kiwi Layered Pops features the delightful kiwi, a fruit known for its unique taste and vibrant green color. Kiwi is not only visually appealing but also packed with nutrients. One of the standout benefits of kiwi is its exceptionally high vitamin C content. Just one medium-sized kiwi can provide more than the daily requirement of this essential nutrient, which plays a vital role in boosting the immune system and promoting skin health.
In addition to vitamin C, kiwi contains dietary fiber, which aids digestion and promotes gut health. The fruit’s natural sweetness and slightly tart flavor make it a perfect pairing with the watermelon layer. To enhance the refreshing essence of the kiwi, coconut water is used in this layer. Coconut water is a natural hydrator, rich in electrolytes, making it an excellent choice for replenishing fluids lost during hot summer days. The subtle sweetness of coconut water complements the tangy profile of kiwi, creating a harmonious blend that is both refreshing and nutritious.
Preparing Watermelon Kiwi Layered Pops
Creating these layered pops is an enjoyable process that allows for creativity and customization. Here’s a step-by-step guide to preparing the Watermelon Kiwi Layered Pops, starting with the watermelon layer.
Creating the Watermelon Layer
1. Selecting the Watermelon: Start by choosing a ripe, juicy watermelon. Look for a watermelon that feels heavy for its size and has a uniform shape. A creamy yellow spot on its underside indicates ripeness.
2. Cutting the Watermelon: Slice the watermelon in half and scoop out the flesh using a melon baller or a spoon, ensuring to remove any seeds. Measure approximately 4 cups of watermelon chunks for the popsicle mixture.
3. Blending the Watermelon: Place the watermelon chunks in a blender. Add 1-2 tablespoons of honey or agave syrup, depending on your sweetness preference, and the juice of half a lime. Blend until smooth, creating a vibrant watermelon puree.
4. Straining (Optional): If you prefer a smoother texture, strain the mixture through a fine-mesh sieve to remove any pulp or seeds. This step is optional, but it can result in a more refined popsicle.
5. Pouring the Watermelon Layer: Pour the watermelon puree into popsicle molds, filling them about halfway. Insert sticks and freeze for about 2-3 hours, or until the layer is firm enough to support the kiwi layer without mixing.
This introductory section sets the stage for the vibrant and refreshing Watermelon Kiwi Layered Pops. Stay tuned as we continue with the preparation of the kiwi layer and the final assembly of these delightful summer treats.
Crafting the Watermelon Layer
To start your Watermelon Kiwi Layered Pops, you’ll need to create the watermelon layer, which is the foundation of these vibrant treats. Begin by cutting the watermelon into chunks and removing any seeds. Place the watermelon pieces into a blender or food processor. Blend until you achieve a smooth consistency, ensuring there are no chunks remaining. This step is crucial, as a smooth mixture will create a more appealing texture for your pops.
Once blended, taste the watermelon puree. Depending on the sweetness of the watermelon, you may want to add a touch of honey or agave syrup to enhance the flavor. Keep in mind that the sweetness can vary based on the ripeness of the fruit, so adjust to your preference.
After achieving the desired sweetness, it’s time to fill the molds. Carefully pour the watermelon mixture into your popsicle molds, filling them about halfway. This allows enough space for the kiwi layer that will be added later. If you have excess mixture, you can store it in the refrigerator for later use or enjoy it as a refreshing drink.
Once filled, insert the sticks into the molds and place them in the freezer. Allow the watermelon layer to freeze for at least 2-3 hours, or until solid. This initial freezing is vital to ensure that the layers don’t mix when adding the kiwi layer.
Crafting the Kiwi Layer
While your watermelon layer is freezing, you can prepare the kiwi layer. Start by peeling the kiwis and slicing them into smaller pieces. Just like with the watermelon, you’ll want to blend the kiwi until it reaches a smooth consistency. If you prefer a sweeter popsicle, consider adding a bit of honey or agave syrup to the kiwi mixture as well.
Once blended, taste it to ensure the flavor meets your expectations. If the kiwi is very tart, a small amount of sweetener can balance the flavor beautifully. It’s essential to achieve a uniform texture without any lumps to maintain the aesthetic of the layered pops.
Now, check on your watermelon layer. If it has solidified properly, carefully pour the kiwi mixture on top of the frozen watermelon layer in the molds. Pour gently to avoid disturbing the watermelon layer below. Fill the molds to the top, leaving just a small amount of space to allow for expansion as the pops freeze.
Return the molds to the freezer and allow them to set for another 4-6 hours, or until completely frozen. Patience is key here; rushing the process can lead to pops that are not fully frozen and may fall apart when unmolding.
Finalizing the Pops
After the kiwi layer has frozen solid, it’s time for the final freezing step. Leave the pops in the freezer for an additional hour after the kiwi layer has set. This ensures that each layer is fully integrated and that the popsicles have the perfect texture.
The ideal popsicle is firm yet creamy, providing that satisfying bite without being too hard. Once the pops have frozen completely, they are ready to be unmolded and served.
Unmolding and Serving
To release the popsicles from the molds, run warm water over the outside of the molds for a few seconds. This gentle heat will help loosen the pops without melting them. Gently pull on the sticks to remove the pops, taking care not to apply too much force, which can break them.
For an eye-catching presentation, consider garnishing your Watermelon Kiwi Layered Pops with fresh mint leaves or a sprinkle of shredded coconut. You could also serve them on a platter adorned with slices of fresh kiwi and watermelon for a colorful display.
These pops are perfect for summer gatherings, birthday parties, or simply as a refreshing treat on a hot day. Enjoy them on their own, or pair them with a light dip made from yogurt for an added flavor dimension.
Nutritional Information
One of the best aspects of Watermelon Kiwi Layered Pops is their nutritional profile. Each popsicle contains approximately 50 calories, making them a guilt-free snack option. They are low in fat and cholesterol-free, making them suitable for various dietary preferences.
These pops are also packed with vitamins and antioxidants. Watermelon is rich in vitamins A and C, promoting hydration and skin health, while kiwis are an excellent source of vitamin C, vitamin K, and dietary fiber. Together, they create a nutritious treat that supports overall well-being while satisfying your sweet tooth.
Fun Facts About Watermelon and Kiwi
To enhance your appreciation for these delicious fruits, here are some fascinating facts:
– Watermelon: Did you know that watermelon is technically a fruit and a vegetable? It belongs to the Cucurbitaceae family, which also includes cucumbers and pumpkins. Watermelons are 92% water, making them an excellent choice for hydration during hot summer days. The first recorded watermelon harvest took place over 5,000 years ago in Egypt!
– Kiwi: Originally known as the Chinese gooseberry, kiwis were renamed after the kiwi bird due to their fuzzy brown exterior, resembling the bird’s feathers. Kiwis are native to China but are now widely cultivated in New Zealand and California. They are high in antioxidants, which can help combat oxidative stress in the body.
These fun facts not only add an interesting element to your popsicle-making experience but also highlight the rich history and nutritional benefits of the fruits you’re using.
Conclusion
Making Watermelon Kiwi Layered Pops is not only a delightful summer activity but also a fantastic way to enjoy fresh, wholesome ingredients. These vibrant pops are sure to be a hit among friends and family. With their refreshing flavors and beautiful presentation, they are perfect for serving at gatherings or simply enjoying as a treat on a warm day.
Not only do these pops provide a delicious way to cool down, but they also deliver essential vitamins and hydration, making them a smart snack choice. Feel free to experiment with different fruit combinations or add other ingredients like coconut milk for creaminess or a splash of lime juice for a zesty kick.
As summer rolls in, gather your ingredients and try this refreshing recipe. You’ll find that creating your layered pops is a simple and enjoyable process that results in a delightful dessert everyone can appreciate. So grab your blender, and let the fun of making these Watermelon Kiwi Layered Pops begin!