
Title: Crunchy Roasted Nut Snack Mix: A Wholesome, Flavor-Packed Treat
Introduction
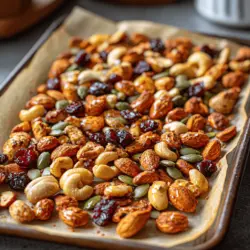
In recent years, the trend towards healthier snacking has surged, with more individuals seeking options that not only satisfy cravings but also contribute to overall well-being. As consumers become increasingly aware of the importance of nutrition, the demand for healthy snacks, such as the Crunchy Roasted Nut Snack Mix, has grown. This delightful treat is not only versatile and easy to make but also packed with nutrients that support a balanced diet.
Nuts and seeds form the cornerstone of this snack mix, providing an array of health benefits. They are rich in healthy fats, proteins, and dietary fiber, making them a fantastic choice for those looking to fuel their bodies with wholesome ingredients. Whether you’re searching for a mid-afternoon pick-me-up or a crunchy topping for your salads, this snack mix is sure to deliver both flavor and nutrition.
The Allure of Homemade Snack Mixes
One of the significant advantages of preparing snacks at home lies in the control it offers over ingredients and flavors. Unlike many store-bought options that can be laden with preservatives, excessive sugars, and unhealthy fats, homemade snack mixes allow for complete customization. You can select the nuts and seeds that align with your taste preferences and dietary requirements, ensuring that each bite is tailored to your liking.
Furthermore, making your own Crunchy Roasted Nut Snack Mix can be a cost-effective solution. Buying ingredients in bulk not only saves money but also allows you to experiment with different flavor combinations without breaking the bank. This DIY approach to snacking encourages creativity in the kitchen, enabling you to create a blend that you truly love while also promoting healthier eating habits.
Ingredient Spotlight: Nutritional Benefits
As we delve into the components of the Crunchy Roasted Nut Snack Mix, it’s essential to highlight the nutritional benefits of each ingredient. This snack mix is not just about taste; it’s a powerhouse of health benefits.
– Raw Almonds: These nuts are celebrated for their high vitamin E content and antioxidant properties, which support skin health and combat oxidative stress.
– Raw Cashews: Known for their creamy texture, cashews are a source of healthy fats and essential minerals such as magnesium and zinc, which are vital for numerous bodily functions.
– Raw Walnuts: Walnuts are renowned for their high omega-3 fatty acid content, which is crucial for heart health and brain function, making them an excellent addition to any diet.
– Pumpkin Seeds (Pepitas): These tiny seeds are packed with magnesium, which is important for muscle function and energy production, as well as zinc, which supports immune health.
– Olive Oil: This healthy fat is rich in monounsaturated fats, which can help reduce inflammation and promote heart health.
– Maple Syrup vs. Honey: Both natural sweeteners bring unique flavors to the mix. Maple syrup offers a distinct taste and is lower on the glycemic index than honey, making it a preferred option for some health-conscious individuals.
– Spices: A blend of sea salt, smoked paprika, garlic powder, and cayenne pepper not only enhances the flavor but also introduces various health benefits, such as improved circulation and digestive health.
– Dried Cranberries: These fruits bring a delightful sweetness and are rich in antioxidants, which can support overall health.
– Dark Chocolate Chips: While they add an indulgent touch, dark chocolate chips also offer health benefits, such as antioxidants and potential heart health advantages when consumed in moderation.
Step-by-Step Guide to Making Crunchy Roasted Nut Snack Mix
Now that we’ve explored the health benefits of each ingredient, let’s move on to the preparation of the Crunchy Roasted Nut Snack Mix. This simple recipe involves a few straightforward steps that will yield a delicious and nutritious snack.
1. Preheating the Oven: Start by preheating your oven to 350°F (175°C). This temperature is ideal for roasting nuts, ensuring they become perfectly crunchy without burning.
2. Preparing the Baking Sheet: Line a baking sheet with parchment paper or a silicone baking mat. This not only prevents the nuts from sticking but also makes cleanup a breeze.
3. Mixing Nuts and Seeds: In a large mixing bowl, combine your chosen nuts (almonds, cashews, and walnuts) and pumpkin seeds. The proportions can be adjusted based on your preferences; however, a balanced mix of nuts will provide diverse flavors and textures.
4. Drizzling Olive Oil: Pour a few tablespoons of olive oil over the nut and seed mixture. This step is essential as it helps to evenly coat the nuts, allowing the spices to adhere better and promoting an even roast.
5. Adding Sweeteners and Spices: Depending on your taste, drizzle maple syrup or honey over the mixture and sprinkle in your selected spices. This combination will create a delightful contrast between the savory and sweet elements of the snack mix.
By following these initial steps, you’re well on your way to creating a delicious and nutritious Crunchy Roasted Nut Snack Mix that will satisfy your snack cravings and provide a host of health benefits. Stay tuned for the next steps in the recipe, where we’ll delve into the roasting process and how to achieve the perfect crunch.
Preparing the Coating
To achieve the perfect coating for your Crunchy Roasted Nut Snack Mix, it’s important to focus on both texture and flavor. Start by choosing a base for your coating—this could be a combination of maple syrup, honey, or agave nectar for sweetness, and olive oil or coconut oil for richness.
For the right consistency, combine 1/4 cup of your chosen sweetener with 2 tablespoons of oil in a mixing bowl. Whisk them together until they are well blended; the mixture should be smooth and slightly viscous, allowing it to coat the nuts evenly. If you prefer a thicker coating, consider adding a tablespoon of nut butter, such as almond or peanut butter, which will provide a richer flavor and creamier texture.
Next, add your flavorings. A pinch of salt will enhance the sweetness, while spices like cinnamon or cayenne pepper can add warmth or a bit of heat. For a more complex flavor, consider incorporating vanilla extract or almond extract—about 1 teaspoon should suffice. Once everything is combined, taste the mixture and adjust the seasonings according to your preference.
Combining and Spreading on the Baking Sheet
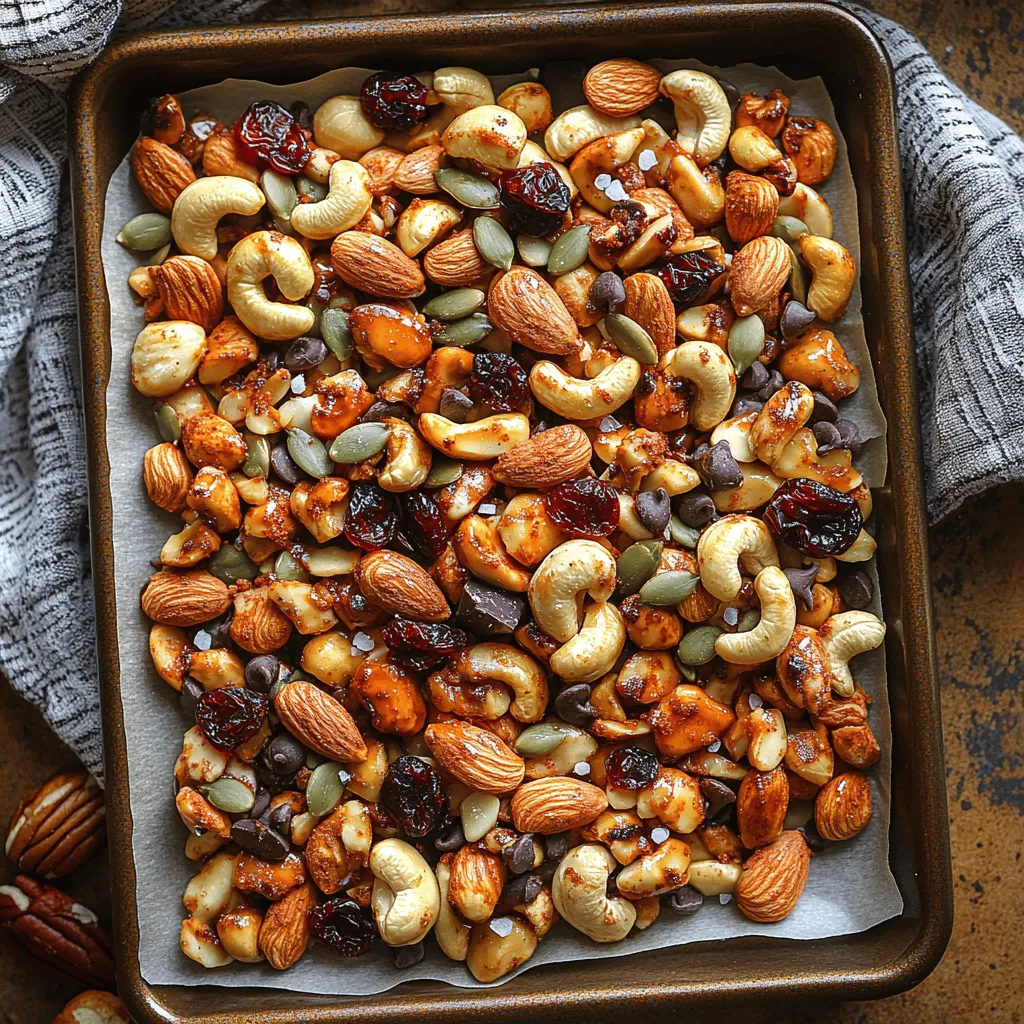
Once your nuts are coated, it’s time to combine them with the remaining ingredients. In a large mixing bowl, combine your chosen nuts—such as almonds, cashews, pecans, and walnuts—with the coating mixture. Use a spatula or wooden spoon to ensure every nut is well-coated.
When spreading the mixture onto the baking sheet, the importance of even distribution cannot be overstated. An even layer allows for uniform roasting, which is crucial for achieving that desired crunchiness. Use a parchment-lined baking sheet for easy cleanup and to prevent sticking. Spread the nut mixture in a single layer, making sure there is space between each nut. This will help them roast evenly without steaming each other.
Roasting Times and Signs to Look For
Roasting your nut mix requires close attention to timing and temperature to achieve that perfect crunch. Preheat your oven to 350°F (175°C) and place your baking sheet in the center of the oven. Roast the nuts for about 10 to 15 minutes, but be sure to stir the mixture halfway through to prevent burning and ensure uniform roasting.
Keep an eye on the nuts during the last few minutes of roasting. The signs to look for include a golden-brown color and a toasted aroma wafting through your kitchen. Remember that nuts continue to cook slightly even after being removed from the oven due to residual heat, so it’s better to take them out when they are just golden rather than dark brown.
Cooling Process
After removing the nuts from the oven, allow them to cool on the baking sheet for at least 20 minutes. The cooling process is essential because it allows the coating to harden, resulting in that satisfying crunch. Avoid the temptation to taste them immediately; they will be very hot, and the texture will not be at its best until they’ve cooled down.
During the cooling phase, stir the nuts occasionally to prevent them from sticking together. Once completely cooled, the nuts will have a delightful crunch and can be mixed with any additional ingredients like dried fruit or chocolate.
Incorporating Dried Fruit and Chocolate
For added flavor and nutrition, incorporating dried fruits and chocolate can elevate your Crunchy Roasted Nut Snack Mix. Dried cranberries, apricots, or cherries provide natural sweetness and a chewy texture that contrasts beautifully with the crunchy nuts.
If you want to include chocolate, consider using dark chocolate chips or chunks, which not only add sweetness but also introduce antioxidants. After your roasted nut mix has fully cooled, fold in approximately 1 cup of dried fruit and 1/2 cup of chocolate. This balance of flavors and textures will make your snack mix even more enjoyable.
Storage Instructions
To ensure your Crunchy Roasted Nut Snack Mix remains fresh and crunchy, storage is key. Once your mix has completely cooled, transfer it to an airtight container. Glass jars or resealable bags work well to maintain freshness. Store the mix in a cool, dry place, away from direct sunlight.
For optimal longevity, your nut mix should last up to two weeks at room temperature. However, if you want to prolong the freshness even further, consider storing it in the refrigerator, where it can last for up to one month. Always check for any signs of spoilage, such as rancidity or an off smell, before consuming.
Creative Variations and Substitutions
Nut-Free Alternatives
If you’re catering to nut allergies or preferences, there are plenty of nut-free alternatives that can be used to create a delightful snack mix. Seeds such as sunflower seeds, pumpkin seeds, or even roasted chickpeas can be excellent substitutes that provide crunch and nutrition. Using legumes like roasted edamame can also add a protein punch.
Sweetening Options
Experimenting with different natural sweeteners can help you create a customized flavor profile suited to your taste. Agave syrup, maple syrup, or date syrup are all great alternatives to honey, which is ideal for vegans. For a lower-calorie option, consider using stevia or monk fruit sweetener.
Spice Variations
Adding spices can completely change the flavor profile of your snack mix. For a sweet twist, sprinkle in some ground cinnamon or nutmeg. If you’re looking for something with a kick, try incorporating chili powder or smoked paprika. These spices can be mixed into the coating or sprinkled on before roasting to ensure even flavor distribution.
Additional Mix-Ins
Feel free to get creative with additional mix-ins. Coconut flakes can add a tropical twist, while other dried fruits, such as figs or raisins, can bring in different textures and flavors. You can also include seeds like chia or flaxseed for an extra health boost.
The Versatility of Crunchy Roasted Nut Snack Mix
Ways to Enjoy the Snack Mix
Your Crunchy Roasted Nut Snack Mix is incredibly versatile and can be enjoyed in many different ways.
– As a Standalone Snack: Simply enjoy it as a quick and healthy snack on-the-go, perfect for munching during your busy day or while watching a movie.
– Incorporating into Meals: Elevate your salads, yogurt bowls, or breakfast cereals by sprinkling a handful of this delicious mix on top. It adds a delightful crunch and enhances nutritional value.
– Perfect for Entertaining: This snack mix is ideal for parties or gatherings. Serve it in a decorative bowl as a sophisticated snack option, or use it as a topping for desserts like ice cream or yogurt parfaits.
Nutritional Information
Understanding the nutritional value of your homemade Crunchy Roasted Nut Snack Mix can help you appreciate it even more. A typical serving size (about 1/4 cup) contains approximately:
– Calories: 200
– Protein: 6 grams
– Fat: 16 grams (mostly healthy fats)
– Carbohydrates: 10 grams
– Fiber: 2 grams
– Sugar: 4 grams (if including dried fruit)
While this snack is high in calories due to the nuts, it’s also packed with protein, healthy fats, and essential nutrients. Portion control is key here; it’s easy to overindulge, so consider measuring out your serving beforehand to enjoy it mindfully.
Conclusion
Making Crunchy Roasted Nut Snack Mix at home is not only rewarding, but it also allows you to customize flavors and ingredients to suit your palate and dietary needs. The satisfaction of creating a healthy snack from scratch is unmatched, and the benefits of knowing exactly what goes into your food cannot be overstated.
We encourage you to try this recipe and experiment with different flavors and ingredients. The joy of healthy snacking lies in the endless possibilities of customization. This homemade treat is perfect for any occasion, whether you’re enjoying it solo or sharing it with friends and family. Dive into the world of healthy snacking with your very own Crunchy Roasted Nut Snack Mix!