
Introduction
As the leaves begin to change color and the air turns crisp, the arrival of fall brings with it an irresistible craving for pumpkin-flavored treats. From lattes to pies, pumpkin makes an appearance in a variety of delicious forms, captivating our taste buds and evoking memories of cozy evenings spent by the fire. Among these seasonal delights, pumpkin chocolate chip oat bars stand out as a versatile and wholesome option that satisfies both sweet cravings and nutritional needs.
Healthy snacking is often a challenge, as many commercially available options are loaded with artificial ingredients and excessive sugars. However, these heavenly pumpkin chocolate chip oat bars provide a delicious remedy, offering a wholesome alternative that doesn’t compromise on taste. Packed with nutritious ingredients, they are perfect for breakfast, mid-afternoon snacks, or even as a delightful dessert. With their chewy texture and rich flavors, these bars are bound to become a staple in your fall baking repertoire.
In this article, we will delve into the recipe for heavenly pumpkin chocolate chip oat bars, exploring the ingredients that make them special and guiding you through the preparation process. Whether you are carving pumpkins or enjoying the autumn scenery, this recipe is sure to elevate your fall experience.
Understanding the Ingredients
The foundation of any good recipe lies in its ingredients, and when it comes to these pumpkin chocolate chip oat bars, each component plays a vital role in both flavor and nutrition. Let’s take a closer look at the key ingredients that make these bars truly heavenly.
1. Pumpkin Puree: The star ingredient of this recipe, pumpkin puree, is not only beloved for its rich, earthy flavor but also for its impressive nutritional profile. Packed with vitamins A and C, pumpkin is a powerhouse of antioxidants and beta-carotene, which supports eye health and boosts the immune system. Additionally, its high fiber content aids digestion, making it a fantastic inclusion in any healthy diet.
2. Oats: Whole grain oats serve as the perfect base for these bars, offering a chewy texture while delivering numerous health benefits. They are an excellent source of soluble fiber, which can help lower cholesterol levels and regulate blood sugar. Oats are also rich in essential nutrients such as iron, magnesium, and B vitamins, making them a wholesome choice for sustained energy throughout the day.
3. Spices: The subtle warmth of spices like cinnamon and nutmeg enhances the overall flavor profile of the bars, transporting you to a cozy autumn kitchen. Cinnamon is renowned not only for its delightful taste but also for its anti-inflammatory properties, while nutmeg adds a hint of sweetness and complexity. The combination of these spices elevates the bars, making every bite feel like a festive fall celebration.
4. Sweeteners: The choice between brown sugar and granulated sugar can significantly affect the flavor and texture of your bars. Brown sugar, with its molasses content, contributes a deeper, more caramel-like flavor, while granulated sugar provides a cleaner sweetness. Both can work well in this recipe, but using a combination of the two can yield a beautifully balanced sweetness that complements the pumpkin and spices.
5. Fat Source: The fat used in the recipe is crucial for achieving the perfect texture. Coconut oil offers a unique flavor and is a fantastic dairy-free option, making these bars suitable for vegan diets. It provides moisture and richness while also being a healthier fat alternative. Alternatively, butter can be used for a more traditional flavor profile, creating a tender crumb that melts in your mouth. Choosing the right fat source can help you tailor the recipe to your dietary preferences.
Preparation Overview
Before diving into the recipe, it’s essential to set yourself up for baking success by understanding the preparation process. Proper preparation not only ensures a smooth baking experience but also contributes to the overall quality of your finished product.
To get started, gather the necessary tools and equipment. You’ll need mixing bowls for combining ingredients, a spatula for efficient mixing and scraping, and a baking dish to hold your oat bars as they bake. A parchment-lined baking dish is recommended for easy removal and cleanup, ensuring that your bars come out perfectly intact.
If you have dietary preferences or restrictions, don’t worry! This recipe is flexible and can be adapted to suit various needs. For those who require gluten-free options, simply use certified gluten-free oats. If you’re looking to make these bars vegan, substitute the eggs with a flaxseed meal or apple sauce for binding, and use coconut oil instead of butter. This versatility allows everyone to enjoy these delightful bars, regardless of dietary restrictions.
Step-by-Step Recipe Guide
Now that you’re familiar with the ingredients and preparation basics, let’s dive into the step-by-step guide for making heavenly pumpkin chocolate chip oat bars. Each step is designed to ensure that your bars turn out perfectly delicious every time.
1. Preheating the Oven: Start by preheating your oven to 350°F (175°C). This is a crucial step, as it ensures even baking throughout the bars. An adequately preheated oven helps the bars rise and develop a beautiful golden-brown color. While the oven is warming, you can prepare the other ingredients, maximizing your efficiency in the kitchen.
2. Mixing Dry Ingredients: In a large mixing bowl, combine the dry ingredients. This typically includes rolled oats, flour (or a gluten-free alternative), baking powder, baking soda, salt, and the warm spices—cinnamon and nutmeg. Thoroughly mixing these dry ingredients ensures even distribution of the leavening agents and spices, which is vital for achieving the desired texture and flavor profile. A whisk can be particularly useful in this step, allowing air into the mixture and preventing clumping.
3. Combining Wet Ingredients: In another bowl, combine the wet ingredients: pumpkin puree, eggs (or your chosen vegan substitute), melted coconut oil (or softened butter), and the sweeteners. Mix these ingredients until they are well combined and the mixture is smooth. Achieving the right consistency at this stage is essential for the final product. If the mixture is too thick, consider adding a splash of milk (dairy or plant-based) to thin it out slightly.
4. Blending Mixtures: Once the wet and dry ingredients are combined, it’s time to bring them together. Pour the wet mixture into the bowl of dry ingredients and gently fold everything together using a spatula. Be careful not to overmix, as this can lead to dense bars. Instead, mix until just combined; a few lumps are perfectly acceptable. The flour should be fully incorporated, and the mixture should appear moist and cohesive.
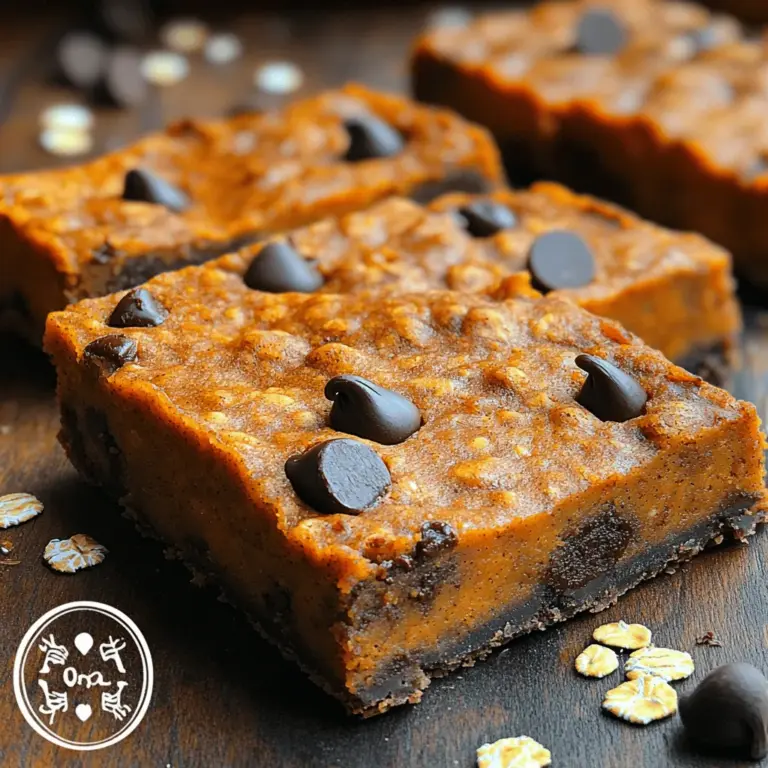
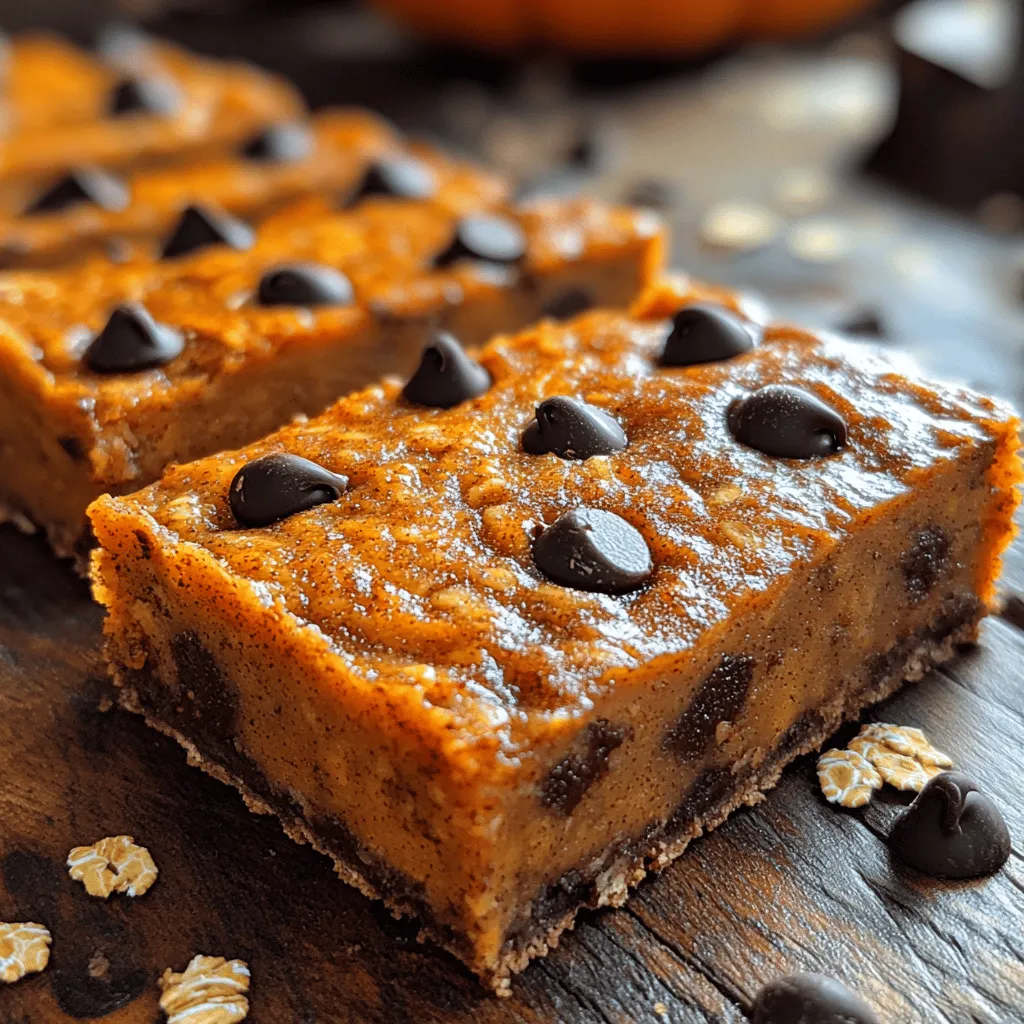
5. Adding Chocolate Chips: Finally, fold in the chocolate chips, ensuring they are evenly distributed throughout the batter. This step not only adds sweetness but also creates delightful pockets of melted chocolate in each bite. For a touch of extra decadence, consider using dark chocolate chips or even white chocolate for a contrasting flavor.
Now that your batter is prepared, it’s time to transfer it to the baking dish and let the oven work its magic. Follow the remaining instructions in the recipe to achieve those perfectly baked heavenly pumpkin chocolate chip oat bars that are sure to be a hit this fall!
Stay tuned for the next part of this article, where we will cover baking times, tips for serving, and common questions related to this delicious recipe.
Transferring to the Baking Dish: Best Practices for Even Spreading
Once your batter is prepared, it’s time to transfer it into a baking dish. To ensure a perfect consistency and even baking, follow these best practices:
1. Choose the Right Baking Dish: A 9×13-inch baking dish is ideal for this recipe, allowing the bars to bake evenly without being too thick or too thin. You can use a glass or metal dish, but note that metal tends to yield slightly crispier edges.
2. Grease and Line the Dish: Before pouring in your batter, grease the dish with cooking spray or butter. Additionally, line the bottom with parchment paper, allowing for some overhang on the sides. This will make it easier to lift the bars out after baking.
3. Pour and Spread: Pour the batter into the prepared dish, and using a spatula, gently spread it out into the corners. Try to maintain an even thickness across the batter to ensure that all parts of the bars bake at the same rate. If you notice any air bubbles, gently tap the dish on the counter to release them.
Baking Process: Signs of Doneness and How to Test for Readiness
Baking the bars at the right temperature is crucial for achieving the perfect texture. Here’s what to keep in mind during the baking process:
1. Preheat Your Oven: Set your oven to 350°F (175°C) and allow it to fully preheat before placing your dish inside. This ensures that the bars begin cooking evenly from the start.
2. Baking Time: Bake the bars for approximately 25-30 minutes. Keep an eye on them starting around the 20-minute mark, as oven temperatures can vary.
3. Signs of Doneness: The bars are ready when the edges are lightly golden and a toothpick inserted into the center comes out clean or with just a few moist crumbs attached (not wet batter). Avoid overbaking, as this can lead to dry bars.
Cooling and Slicing: Techniques for Achieving Clean Cuts and Preserving Texture
Cooling and slicing your pumpkin chocolate chip oat bars properly will ensure they maintain their delightful texture and look appealing when served.
1. Cooling: Once baked, remove the dish from the oven and place it on a wire rack to cool. Allow the bars to cool in the dish for about 10-15 minutes before attempting to slice. This helps them firm up a bit, making it easier to cut without crumbling.
2. Slicing Techniques: To achieve clean cuts, use a sharp knife or a pizza cutter. For the best results, run the knife under hot water and then wipe it dry before slicing. This will help prevent the bars from sticking to the blade.
3. Storage After Slicing: After slicing, consider storing the bars in an airtight container. This will keep them fresh and chewy for longer.
Flavor Variations and Customization
One of the joys of baking is the ability to customize recipes to suit your tastes. Here are some suggestions for tweaking your heavenly pumpkin chocolate chip oat bars:
1. Types of Chocolate Chips: While semi-sweet chocolate chips are a classic choice, you can experiment with other varieties. Try using dark chocolate chips for a richer flavor, white chocolate chips for a sweeter touch, or even peanut butter chips for a unique twist.
2. Adding Spices or Extracts: To elevate the flavors, consider adding spices such as ground ginger or cloves. A teaspoon of vanilla extract or almond extract can also add an aromatic depth to the bars, enhancing the overall taste profile.
3. Mix-Ins: Get creative with mix-ins! You can add a handful of dried cranberries, raisins, or chopped nuts like walnuts or pecans. For a boost of nutrition, consider tossing in some seeds like pumpkin seeds or sunflower seeds.
4. Adjusting Sweetness Levels: If you prefer less sweetness, you can reduce the amount of brown sugar or use a sugar substitute. Alternatively, add a touch of maple syrup for a unique flavor profile while keeping the bars deliciously sweet.
Storage and Serving Suggestions
To keep your bars fresh and delightful for as long as possible, consider the following storage options:
1. Storing for Freshness: Store the bars at room temperature in an airtight container for up to five days. For longer storage, refrigerate them, where they can last up to two weeks. If you want to keep them even longer, consider freezing the bars. Just make sure to wrap them tightly in plastic wrap and place them in a freezer-safe container.
2. Creative Serving Ideas: Serve your pumpkin chocolate chip oat bars warm or at room temperature. Pair them with a dollop of Greek yogurt or a scoop of vanilla ice cream for a delicious dessert. They also make a fantastic accompaniment to your morning coffee or tea.
3. Enjoying Beyond Fall: While these bars are perfect for autumn, their delicious flavor makes them suitable for year-round enjoyment. They can be a delightful treat during any season, especially when you need a sweet pick-me-up.
Health Benefits of Pumpkin and Oats
This recipe not only satisfies your cravings but also packs a nutritional punch. Here’s a closer look at the health benefits of the primary ingredients:
1. Pumpkin: Rich in vitamins A and C, pumpkin is a powerhouse of antioxidants and nutrients. It promotes healthy eyesight, supports immune function, and may help reduce the risk of chronic diseases. The fiber content in pumpkin also aids digestion and helps keep you feeling full.
2. Oats: Oats are a fantastic source of soluble fiber, which is beneficial for heart health. Regular consumption of oats can help lower cholesterol levels and improve overall heart function. They also provide sustained energy, making them an excellent ingredient for breakfast or snacks.
3. Balance of Indulgence and Nutrition: With the combination of pumpkin and oats, these bars strike a perfect balance between indulgence and health. You can enjoy a treat that satisfies your sweet tooth while still nourishing your body.
Conclusion
Making and enjoying heavenly pumpkin chocolate chip oat bars is a delightful experience that combines the warmth of home baking with the health benefits of wholesome ingredients. These bars encapsulate the essence of fall flavors while being versatile enough to enjoy any time of year.
By incorporating customization options, you can tailor this recipe to suit your tastes and dietary preferences. Whether you’re making these for a cozy evening at home, a gathering with friends, or simply as a nutritious snack for yourself, they are sure to bring joy and satisfaction.
We encourage you to explore the joy of baking these bars and share your own variations with friends and family. After all, the best part of baking is not just the delicious results but also the fun and creativity involved in the process. Enjoy your baking adventure!
