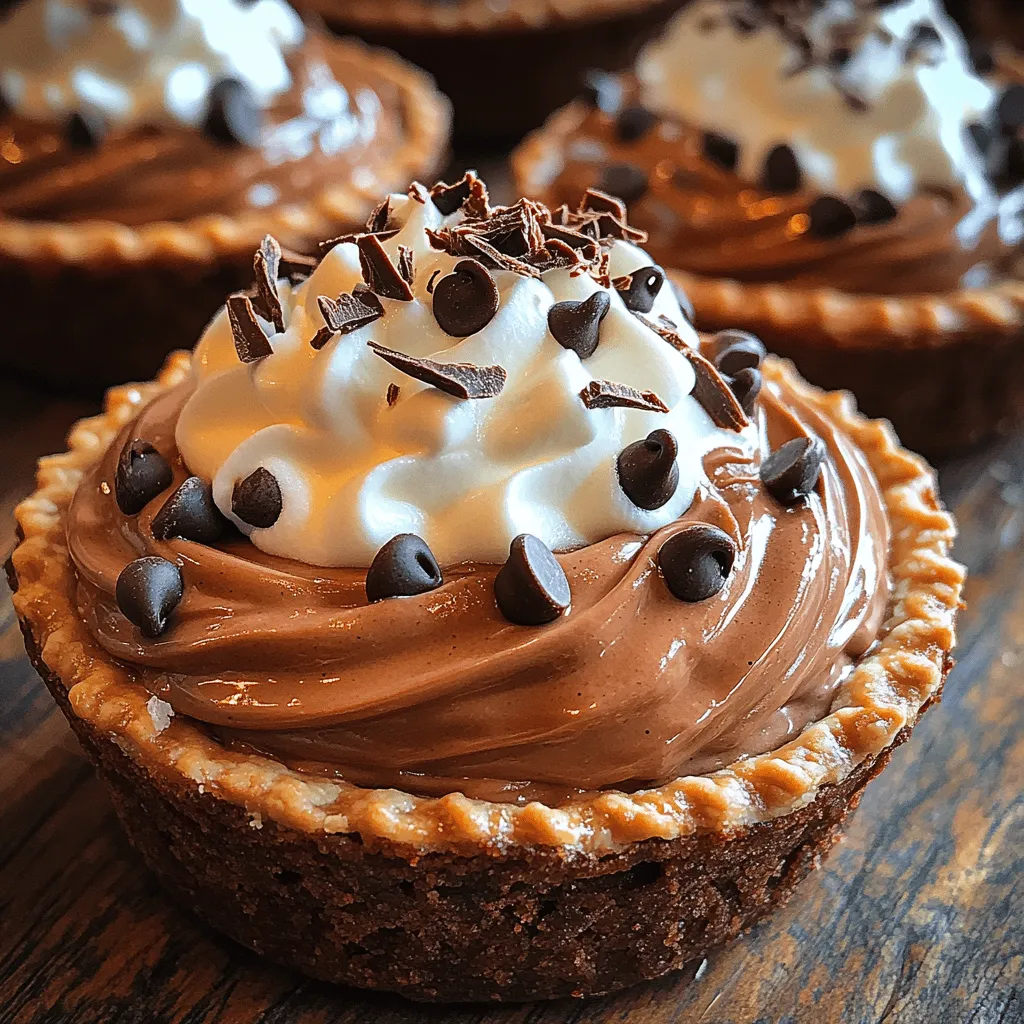
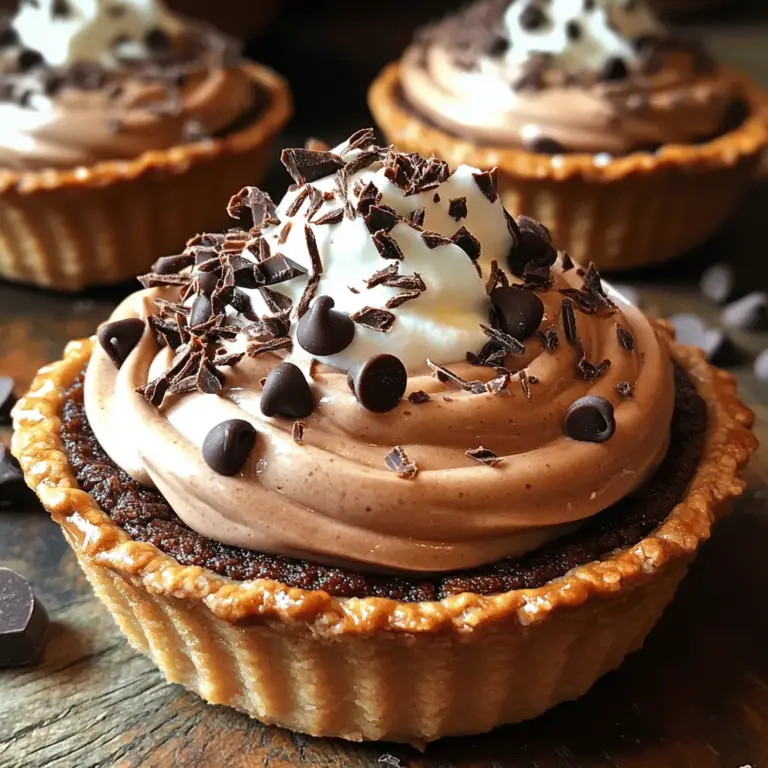
Indulging in a dessert that combines rich chocolate flavor with a delicate creamy texture is an absolute delight for any chocolate lover. Mini Chocolate Cream Pies offer the perfect balance of sweetness and decadence, making them an ideal treat for gatherings, celebrations, or simply a cozy night in. These petite desserts not only satisfy your sweet tooth but also provide a visually appealing presentation, making them a hit at any event.
In this article, we will explore the intricacies of crafting these delightful mini pies, from creating the perfect crust to mastering the luscious chocolate cream filling, and topping them off with a light whipped cream. Whether you are a seasoned baker or a novice in the kitchen, this guide will provide you with all the steps needed to create these irresistible desserts.
Understanding the Components of Mini Chocolate Cream Pies
To fully appreciate the art of making Mini Chocolate Cream Pies, it’s essential to understand the individual components that come together to create this delicious treat. Each layer plays a crucial role in developing the overall flavor and texture, making it necessary to pay attention to detail in each step of the process.
Exploring the Crust
The crust of the Mini Chocolate Cream Pie is the foundation of this dessert, making it a critical element to get right. A chocolate wafer crust is the traditional choice, as it complements the rich chocolate filling beautifully.
1. Importance of the Chocolate Wafer Crumbs: The use of chocolate wafer crumbs not only adds a chocolatey flavor to the crust but also creates a contrast to the creamy filling. The slight bitterness of the chocolate enhances the overall taste profile, making each bite more flavorful.
2. Role of Butter and Sugar in Crust Texture: Butter adds richness and moisture, while sugar provides sweetness and helps bind the crumbs together. When the crust is baked, the butter melts and creates a firm yet tender base for the pie. The combination of these ingredients achieves that perfect crispiness when baked, ensuring that the crust holds its shape while still being easy to bite into.
3. Alternatives to Chocolate Wafer Crumbs for Varied Flavors: If you want to experiment with flavors, there are alternatives to chocolate wafer crumbs. Consider using graham cracker crumbs for a hint of honey sweetness, or even crushed Oreos for a deeper chocolate flavor. These variations allow you to personalize your mini pies while maintaining a delicious base.
Crafting the Chocolate Cream Filling
The filling is the star of the show in any chocolate cream pie. A rich chocolate cream filling brings a luxurious texture and flavor that pairs perfectly with the crust.
1. Breakdown of Filling Ingredients and Their Functions: The primary ingredients in the chocolate cream filling typically include high-quality cocoa powder, sugar, milk, heavy cream, and egg yolks. Each component plays a vital role:
– Cocoa Powder: Provides the rich chocolate flavor.
– Sugar: Balances the bitterness of the cocoa.
– Milk and Heavy Cream: Create a creamy and smooth texture.
– Egg Yolks: Act as a thickening agent, enriching the filling with a custard-like quality.
2. The Significance of Tempering Egg Yolks: When making the filling, tempering the egg yolks is a crucial step. This process involves gradually introducing hot liquid to the yolks to prevent them from scrambling. Properly tempered yolks ensure a silky-smooth filling that sets beautifully without any lumps.
3. Tips for Achieving a Silky-Smooth Consistency: To achieve that luxurious texture, make sure to whisk the filling mixture constantly as it heats. This helps prevent any curdling and ensures that the mixture thickens evenly. Additionally, using a fine mesh strainer to strain the filling before chilling can remove any small lumps, yielding a velvety finish.
Creating the Whipped Topping
No chocolate cream pie is complete without a light and airy whipped topping that adds a lovely contrast to the rich filling below.
1. Importance of Using Cold Ingredients for the Best Texture: The key to a perfect whipped topping is to start with cold ingredients. Ensure that your cream, mixing bowl, and beaters are chilled before whipping. Cold conditions help the cream whip up faster and achieve a light, fluffy texture.
2. Variations in Toppings: From Classic Whipped Cream to Flavored Options: While classic whipped cream is always a favorite, there are numerous ways to add a twist to your topping. Consider infusing your whipped cream with vanilla, almond extract, or even a hint of espresso for a unique flavor boost. For a festive touch, try folding in some crushed peppermint or adding a splash of liqueur.
3. Creative Garnishing Ideas for Presentation: To make your Mini Chocolate Cream Pies truly stand out, consider garnishing them with chocolate shavings, a dusting of cocoa powder, or fresh berries. These finishing touches not only enhance the flavor but also add visual appeal, making your dessert look as good as it tastes.
Step-by-Step Instructions for Mini Chocolate Cream Pies
Now that we have an understanding of the components that make up Mini Chocolate Cream Pies, let’s dive into the step-by-step instructions to bring this delightful dessert to life.
Preparing the Crust
1. Detailed Guide on Mixing and Pressing the Crust: Start by preheating your oven to 350°F (175°C). In a mixing bowl, combine 1 ½ cups of chocolate wafer crumbs with ¼ cup of granulated sugar and ½ cup of melted butter. Mix until the crumbs are fully coated and resemble wet sand.
Next, take a tablespoon of this mixture and press it firmly into the bottom and sides of each mini pie dish. Ensure that the crust is evenly distributed and compacted to create a sturdy base.
2. Baking Tips to Ensure the Crust is Perfectly Crisp: Place the prepared pie crusts in the preheated oven and bake for about 8-10 minutes. Keep a close eye on them to prevent over-baking, as you want the crust to be firm but not burnt. Once baked, remove the crusts from the oven and allow them to cool completely. This cooling step is essential as it helps to set the crust, making it easier to fill with the chocolate cream.
3. Cooling Tips for Optimal Filling Placement: As the crust cools, you can prepare the chocolate cream filling. Ensure that the crusts are completely cool before adding the filling. If the crust is warm, it may cause the filling to melt and lose its desired texture.
Making the Chocolate Cream Filling
1. Step-by-Step Process for Whisking and Simmering the Mixture: In a medium saucepan over medium heat, combine 2 cups of whole milk and ½ cup of granulated sugar. Whisk continuously until the sugar dissolves and the mixture is warm but not boiling. In a separate bowl, whisk together 4 egg yolks and ½ cup of cocoa powder until smooth.
Gradually pour a small amount of the warm milk mixture into the egg yolk mixture, whisking constantly to temper the yolks. Once combined, return the entire mixture to the saucepan and continue to whisk over medium heat until it begins to thicken, about 5-7 minutes.
2. The Critical Nature of Constant Stirring for Even Cooking: It’s essential to stir the mixture constantly during this process to prevent it from sticking to the bottom of the pan and to achieve an even thickness. You’ll know it’s ready when it coats the back of a spoon and leaves a clear line when you run your finger through it.
As we continue to explore the delightful world of Mini Chocolate Cream Pies in the next part, we will delve into completing the whipped topping and presenting these charming desserts beautifully. Stay tuned for more mouthwatering details and tips to ensure your mini pies are nothing short of perfection!

How to Identify When the Filling is Thickened Enough
The key to a perfect chocolate cream filling lies in the thickness. When you’re cooking the filling on the stove, keep a close eye on its consistency. The filling is thickened enough when it coats the back of a spoon and leaves a clear line when you run your finger through it. This usually occurs around the time when the mixture starts to bubble gently. Remember, it will continue to thicken slightly as it cools, so aim for a texture that feels just a bit looser than your desired final consistency.
Incorporating the Egg Yolks
The incorporation of egg yolks into your filling is what brings richness and a silky texture to your mini chocolate cream pies. However, it’s essential to temper the egg yolks to prevent them from scrambling when they come in contact with the hot mixture.
To temper the yolks, begin by whisking them in a separate bowl. Gradually introduce the hot filling to the egg yolks by adding a few tablespoons at a time while whisking constantly. This process gently raises the temperature of the yolks without cooking them. Once you’ve added about half of the hot mixture to the yolks, you can pour this mixture back into the saucepan with the remaining filling.
If you notice that the egg yolks are starting to cook (indicated by visible bits of scrambled egg), remove the saucepan from the heat immediately and continue whisking. If you encounter this issue, you can use a fine-mesh strainer to strain the mixture back into the saucepan, removing any bits of cooked egg.
Finishing the Filling and Setting
Once the egg yolks are successfully incorporated, return the saucepan to medium heat and continue to cook the filling for another couple of minutes until it thickens even more. Pour the filling into the prepared mini pie crusts with a steady hand. To achieve a smooth surface, use a spatula to gently spread the filling into the edges of the crust.
Chill the filled pies in the refrigerator for at least two hours, but ideally four hours, to allow the filling to set properly. Factors that can influence the setting process include the temperature of your refrigerator and how well the filling was cooked. A well-cooked filling will set more firmly than one that is undercooked.
Whipping the Topping to Perfection
The topping for your mini chocolate cream pies is just as important as the filling. To achieve soft peaks while whipping the cream, start with cold heavy cream. Pour the cream into a mixing bowl and, using an electric mixer on medium speed, begin whipping. You can gradually increase the speed as the cream thickens.
Add granulated sugar after the cream starts to form bubbles. This sugar not only sweetens but also stabilizes the cream, allowing it to hold its shape longer. Whip until you reach soft peaks—this means that when you lift the whisk, the cream should fall slowly without collapsing.
Common mistakes to avoid include over-whipping the cream, which can lead to a grainy texture and even butter, and not using cold cream, which results in a less voluminous whipped cream. Remember, a little patience goes a long way when whipping cream.
Assembling the Mini Chocolate Cream Pies
With your chocolate filling set and whipped cream ready, it’s time to assemble your mini pies. For the best presentation, consider piping the whipped cream onto each pie. Use a piping bag fitted with a decorative tip to create elegant swirls on top of the filling. If you don’t have a piping bag, a zip-top bag with a corner snipped off can serve as a great alternative.
Garnish your pies with chocolate shavings, crumbled cookies, or a sprinkle of cocoa powder for an extra touch of elegance. Presentation is key in dessert enjoyment, and these little details can elevate your mini chocolate cream pies from ordinary to extraordinary.
Serving Suggestions for Mini Chocolate Cream Pies
To enjoy your mini chocolate cream pies at their best, serve them chilled. The ideal serving temperature enhances the chocolate flavor and the creamy texture. Pair these delightful desserts with a glass of cold milk, coffee, or even a dessert wine, which can complement the richness of the chocolate.
If you’re serving these mini pies at a gathering, consider placing them on a decorative platter for a stunning presentation. They pair beautifully with fresh berries, which add a tart contrast to the sweetness of the pies.
For storage, keep the pies in an airtight container in the refrigerator. They are best eaten within three days, as the crust can become soggy over time. If you want to make them ahead, prepare the filling and crust separately and assemble them just before serving to ensure optimal freshness.
Conclusion: Enjoying Your Homemade Mini Chocolate Cream Pies
Creating Mini Chocolate Cream Pies is not only a delightful culinary experience but also a rewarding one that results in a dessert that is visually appealing and rich in flavor. By meticulously following the steps outlined, you can confidently prepare these mini delights for any occasion. Whether you choose to indulge in them at a festive gathering or as a sweet treat at home, each bite promises joy and satisfaction.
Celebrate the art of baking and the pleasure of sharing delicious desserts with loved ones by indulging in these delightful treats. The combination of a buttery crust, creamy chocolate filling, and luscious whipped cream topping will surely impress anyone who has the pleasure of tasting them. So, gather your ingredients and get ready to embark on a delightful baking adventure that will leave a lasting impression. Enjoy your homemade mini chocolate cream pies!


