Luscious Blueberry Cheesecake Bars Recipe: Indulge in a Delightful Dessert Experience

WANT TO SAVE THIS RECIPE?

Introduction

Welcome to the world of indulgent desserts where flavors come together to create a slice of heaven! Today, we’re diving into the delightful realm of Luscious Blueberry Cheesecake Bars. These bars are not just a sweet treat; they are a celebration of the vibrant taste of fresh blueberries combined with the creamy richness of cheesecake. Perfect for summer gatherings, potlucks, or a cozy night in, these cheesecake bars are sure to impress both your family and friends.

Brief Overview of the Recipe

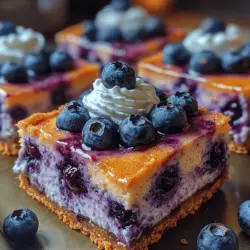
This recipe for blueberry cheesecake bars features a buttery graham cracker crust, a velvety cream cheese filling, and a luscious blueberry topping that is both refreshing and decadent. The combination of sweet and tangy blueberries cuts through the richness of the cheesecake, creating a balanced dessert that is hard to resist. Each bite is a burst of flavor, making these bars an irresistible choice for any occasion.

Whether you are an experienced baker or a novice in the kitchen, this recipe is straightforward and easy to follow. With just a few steps, you can whip up a batch of these stunning cheesecake bars that look as beautiful as they taste. As you embark on this culinary adventure, remember that the quality of your ingredients plays a significant role in the outcome of your dessert.

Importance of Using Quality Ingredients

When it comes to making blueberry cheesecake bars, the quality of your ingredients can significantly affect the final product. Fresh blueberries are essential for achieving that vibrant color and flavor that makes this dessert stand out. Opt for plump, ripe blueberries that are in season for the best taste. If fresh berries are unavailable, frozen blueberries can be used, but make sure to thaw and drain them properly to avoid excess moisture in your filling.

Additionally, using high-quality cream cheese is crucial for a rich and creamy filling. Look for full-fat cream cheese for the best results, as it will yield a smoother texture and intense flavor. The same goes for your graham crackers; choose a brand that uses simple ingredients, avoiding any artificial additives.

Lastly, don’t skimp on the sugar and vanilla extract. These components enhance the overall flavor profile of your cheesecake bars, ensuring each bite is a delightful experience. Remember, the better the ingredients, the more delicious your dessert will be!

The Joy of Making Dessert from Scratch

There is something incredibly satisfying about creating a dessert from scratch. The process allows you to embrace your creativity while honing your baking skills. Making blueberry cheesecake bars from scratch not only gives you control over the ingredients but also allows you to customize the flavors to your liking. Whether you want to add a hint of lemon zest for brightness or swap out the blueberries for another berry, the possibilities are endless.

Baking can also be a therapeutic activity—mixing, pouring, and baking can be a form of meditation, allowing you to unwind and focus on the task at hand. Plus, sharing your homemade creations with loved ones brings a sense of joy and accomplishment that store-bought treats simply cannot replicate. So, gather your ingredients, roll up your sleeves, and let’s get started on this delicious journey!

Understanding the Basics of Cheesecake Bars

Before diving into the recipe, it’s essential to understand the fundamentals of making cheesecake bars. This knowledge will not only help you achieve the best results but also enhance your overall baking experience.

The History of Cheesecake: A Culinary Journey

Cheesecake has a rich history that dates back thousands of years. Its origins can be traced back to ancient Greece, where it was served to athletes during the first Olympic Games as a source of energy. The Romans later adopted the recipe, spreading it throughout Europe. Over time, different cultures added their unique twists to the classic dessert, resulting in the many variations we enjoy today.

In the United States, cheesecake gained popularity in the 19th century, thanks to the introduction of cream cheese. This creamy version quickly became a favorite, leading to the creation of iconic New York-style cheesecake. Today, cheesecake is celebrated in countless forms, from traditional slices to bars, making it a versatile dessert that can be enjoyed in various settings.

Different Types of Cheesecake and Their Uses

Cheesecake comes in various forms, each offering a unique texture and flavor profile. Some popular types include:

1. Classic New York Cheesecake: Dense and creamy, often served plain or with fruit toppings.

2. No-Bake Cheesecake: A lighter alternative that uses whipped cream or whipped topping for a fluffy texture.

3. Baked Cheesecake: Made with eggs, which helps create a rich and custard-like filling.

4. Fruit-Top Cheesecake: Topped with fresh fruit or fruit compote, adding sweetness and freshness to the richness of the cheese.

For this recipe, we will focus on a baked cheesecake bar that incorporates fresh blueberries, creating a delightful combination of flavors that everyone will love.

Essential Ingredients for Blueberry Cheesecake Bars

Now that we have a grasp on the history and variations of cheesecake, let’s delve into the essential ingredients for making these luscious blueberry cheesecake bars.

Graham Cracker Crust

The foundation of any cheesecake bar is the crust. For our blueberry cheesecake bars, we will use crushed graham crackers, which provide a buttery, sweet base that complements the creamy filling. You can make your own by crushing whole graham crackers or use store-bought crumbs for convenience.

Cream Cheese

The star of the show! Cream cheese gives our cheesecake bars their rich and creamy texture. Make sure to use full-fat cream cheese for the best results, as lower-fat varieties may result in a less desirable texture.

Sugar

Granulated sugar is essential for sweetening both the crust and the filling. It balances the tanginess of the cream cheese and enhances the overall flavor of the dessert.

Eggs

Eggs help bind the filling together and contribute to the creamy texture. They also provide structure, ensuring that our cheesecake bars hold their shape once baked.

Fresh Blueberries

Fresh blueberries bring a burst of flavor and color to our dessert. They can be folded into the cheesecake filling or used as a topping for added freshness.

Vanilla Extract

A splash of pure vanilla extract enhances the overall flavor of the cheesecake, adding a lovely aromatic note that elevates the dessert.

Lemon Juice (Optional)

A small amount of lemon juice can brighten the flavor of your cheesecake, balancing the sweetness with a hint of acidity. This is optional but highly recommended for those who enjoy a zesty kick.

Flour: Choosing the Right Type

While our cheesecake filling doesn’t require flour, it is important to note that some recipes may call for flour to stabilize the filling. If you choose to incorporate flour, all-purpose flour works best as it provides the right texture without altering the flavor of the cheesecake.

Eggs: Fresh vs. Store-Bought

When it comes to eggs, fresh, high-quality eggs are always the best option. They contribute to the overall richness and texture of your cheesecake. If you have access to farm-fresh eggs, use those for an enhanced flavor experience.

Salt: Enhancing Flavor

A pinch of salt is often added to desserts to enhance and balance flavors. It’s a small but vital ingredient that helps to bring out the sweetness of the sugar and the richness of the cream cheese.

Water: When and Why to Use It

Water is typically not a primary ingredient in cheesecake bars; however, it may be used when preparing a water bath for baking. A water bath helps regulate the temperature while baking, ensuring even cooking and preventing cracks in your cheesecake.

Tools and Equipment for Making Cheesecake Bars

To create your luscious blueberry cheesecake bars, it’s essential to have the right tools and equipment on hand. Here’s a list of must-have items that will make the process smoother and more enjoyable.

Essential Tools for Homemade Cheesecake Bars

1. Mixing Bowls: A set of mixing bowls in various sizes will help you prepare your crust and filling separately.

2. Electric Mixer: A hand or stand mixer is crucial for achieving a smooth and creamy cheesecake filling.

3. Measuring Cups and Spoons: Accurate measurements are key to successful baking, so ensure you have these on hand.

4. Rubber Spatula: A spatula is excellent for scraping down the sides of your mixing bowl and folding in the blueberries.

5. Baking Pan: A 9×9 inch square baking pan is perfect for this recipe. Make sure to line it with parchment paper for easy removal.

6. Cooling Rack: Once baked, allowing your cheesecake bars to cool properly is important for achieving the right texture.

Optional Tools for the Enthusiast

1. Parchment Paper: Lining your baking pan with parchment paper makes it easier to lift out the cheesecake bars once they’ve cooled.

2. Food Processor: If you prefer a finer graham cracker crust, a food processor can quickly crush the crackers to the desired consistency.

3. Offset Spatula: This tool can help you spread the cheesecake filling evenly in the pan for a beautifully smooth top.

Step-by-Step Guide to Making Blueberry Cheesecake Bars

With the ingredients and tools ready, it’s time to dive into the step-by-step process of making luscious blueberry cheesecake bars. Follow these instructions carefully for a successful outcome that you can be proud of!

Preparing the Dough

1. Prepare Your Baking Pan: Preheat your oven to 325°F (163°C). Line a 9×9 inch baking pan with parchment paper, allowing some overhang on the sides for easy removal later.

2. Make the Graham Cracker Crust: In a mixing bowl, combine crushed graham crackers with melted butter and sugar. Mix until the crumbs are evenly coated and resemble wet sand. Pour this mixture into the prepared baking pan and press it firmly into the bottom to create an even layer. Bake the crust for about 10 minutes or until lightly golden. Remove from the oven and let it cool.

Measuring Ingredients Accurately

While your crust is cooling, measure out your ingredients for the cheesecake filling. Accurate measurements are crucial for achieving the right texture and flavor balance in your bars.

Mixing Cream Cheese and Sugar

In a large mixing bowl, beat the cream cheese until smooth and creamy, using an electric mixer on medium speed. Gradually add in the granulated sugar, mixing until fully incorporated and fluffy. Scraping the sides of the bowl occasionally helps to ensure everything is well combined.

Adding Eggs and Flavorings

Add the eggs one at a time, mixing on low speed after each addition until just combined. Overmixing can introduce air into the batter, leading to cracks during baking. Then, add in the vanilla extract and lemon juice if using, mixing until everything is well blended.

Incorporating the Blueberries

Gently fold in the fresh blueberries with a rubber spatula, being careful not to break them apart. This will give your cheesecake bars a beautiful marbled effect and pockets of juicy fruit.

Pouring the Filling Over the Crust

Once your filling is ready, pour it over the cooled graham cracker crust, spreading it evenly with the spatula. Smooth out the top to ensure a nice finish once baked.

Baking the Cheesecake Bars

Bake the cheesecake bars in the preheated oven for 30-35 minutes, or until the edges are set and the center has a slight jiggle. Remember, the bars will continue to set as they cool, so it’s important not to overbake them.

Cooling and Setting

After baking, remove the cheesecake bars from the oven and let them cool in the pan on a wire rack. Once they reach room temperature, refrigerate for at least 4 hours, or overnight, to allow the flavors to meld and the texture to firm up.

Once set, you can lift the bars out of the pan using the parchment paper overhang, slice them into squares, and serve them chilled or at room temperature.

Stay tuned for the next part of this article, where we will explore some tips for achieving the best results and answer common questions about blueberry cheesecake bars. Enjoy the process of creating your masterpiece, and prepare to delight your taste buds with this luscious dessert!

Welcome to the world of indulgent desserts where flavors come together to create a slice of heaven! Today, we’re diving into the delightful realm of <strong>Luscious Blueberry Cheesecake Bars</strong>. These bars are not just a sweet treat; they are a celebration of the vibrant taste of fresh blueberries combined with the creamy richness of cheesecake. Perfect for summer gatherings, potlucks, or a cozy night in, these cheesecake bars are sure to impress both your family and friends.” /></p>
</p>
<h3>Cutting the Pasta</h3>
</p>
<p>Once you have rolled out your pasta dough to the desired thickness, the next step is cutting it into your preferred shapes. The ideal thickness typically ranges from 1/16 to 1/8 inch, allowing for a tender but sturdy pasta that will hold up well to your sauces. To begin the cutting process, make sure to lightly flour your rolled-out dough to prevent sticking.</p>
</p>
<p>Using a sharp knife or a pizza cutter, you can create long strips for various pasta shapes. For fettuccine, you’ll want to cut your dough into strips that are about 1/4 inch wide. Tagliatelle, on the other hand, should be slightly wider, about 1/2 inch. If you’re aiming for pappardelle, cut your pasta into strips that are at least 3/4 inch wide.</p>
</p>
<h3>Different Shapes: Fettuccine, Tagliatelle, and Pappardelle</h3>
</p>
<p>The beauty of homemade pasta lies not just in its flavor but also in its versatility. Fettuccine, with its flat and wide shape, is perfect for holding rich sauces. Tagliatelle, slightly thicker, is often paired with heavier sauces like Bolognese, while pappardelle, the widest of the three, is traditionally served with robust meat sauces or braises.</p>
</p>
<p>To achieve these different shapes, simply adjust your cutting technique. After cutting, you can either leave the pasta flat or twist it into nests for easier storage.</p>
</p>
<h3>Tips for Uniform Cuts</h3>
</p>
<p>Uniformity in pasta shapes ensures even cooking, which is crucial for achieving the right texture. Here are some tips to ensure consistent cuts:</p>
</p>
<p>1. <strong>Use a Ruler</strong>: If you want to be precise, use a ruler to measure the width of each strip before cutting.</p>
<p>2. <strong>Chill Your Dough</strong>: If the dough becomes too soft while rolling, refrigerate it for a few minutes to make it easier to cut.</p>
<p>3. <strong>Flour as Needed</strong>: Always keep your workspace and tools floured to prevent sticking.</p>
<p>4. <strong>Practice Makes Perfect</strong>: Don’t worry if your first batch isn’t perfect. Making pasta is a skill that improves with practice.</p>
</p>
<h3>Cooking the Pasta</h3>
</p>
<p>Once your pasta is cut, it’s time to cook it. Fresh pasta cooks more quickly than dried pasta, so keep a close eye on the timing.</p>
</p>
<h4>Boiling Techniques for Perfect Texture</h4>
</p>
<p>Start by bringing a large pot of salted water to a rolling boil. The salt enhances the flavor of the pasta, so don’t skip this step. Add your fresh pasta and gently stir to prevent it from sticking together.</p>
</p>
<h4>Cooking Times for Different Shapes</h4>
</p>
<p>Cooking times will vary based on the thickness of the pasta you’ve made. Generally, fresh fettuccine cooks in about 2-3 minutes, tagliatelle in 3-4 minutes, and pappardelle can take around 4-5 minutes. Always taste your pasta a minute or two before the recommended time to ensure it is cooked to your liking.</p>
</p>
<h3>Creative Ways to Serve Homemade Pasta</h3>
</p>
<p>Now that your pasta is cooked to perfection, let’s explore some delicious ways to serve it.</p>
</p>
<h4>Classic Sauces that Pair Well with Fresh Pasta</h4>
</p>
<p>1. <strong>Simple Tomato Sauce</strong>: A classic tomato sauce is a go-to for fresh pasta. Sauté garlic and onions in olive oil, add crushed tomatoes, and let it simmer for about 20 minutes. Season with salt, pepper, and a dash of sugar to balance the acidity.</p>
</p>
<p>2. <strong>Creamy Alfredo Sauce</strong>: This rich sauce is made by melting butter and cream together, adding garlic for flavor, and finishing with a generous amount of Parmesan cheese. Toss your cooked pasta in this creamy mixture for a decadent dish.</p>
</p>
<p>3. <strong>Pesto: Fresh Basil Bliss</strong>: Combine fresh basil, garlic, pine nuts, Parmesan cheese, and olive oil in a food processor for a vibrant and flavorful sauce. This is especially delightful with fettuccine or tagliatelle.</p>
</p>
<h4>Adding Protein and Vegetables</h4>
</p>
<p>Enhance your pasta dishes by adding protein and seasonal vegetables.</p>
</p>
<p>– <strong>Grilled Chicken or Shrimp</strong>: Grilled chicken or shrimp can elevate your pasta to a complete meal. Simply season and grill your protein of choice, then toss it with your pasta and sauce.</p>
</p>
<p>– <strong>Seasonal Vegetables</strong>: Incorporate fresh, seasonal vegetables for added nutrition and flavor. Asparagus, zucchini, and bell peppers are wonderful additions. Sauté them briefly before mixing them into your pasta.</p>
</p>
<h4>Garnishing and Presentation Ideas</h4>
</p>
<p>Presentation can make a significant difference in the enjoyment of your dish.</p>
</p>
<p>– <strong>Fresh Herbs and Cheese</strong>: Garnish with freshly chopped herbs like basil or parsley, and a sprinkle of grated Parmesan or Pecorino cheese for that perfect finishing touch.</p>
</p>
<p>– <strong>Serving Suggestions for a Restaurant-Style Finish</strong>: Serve your pasta in warm bowls, and drizzle with high-quality olive oil or a balsamic reduction for an elegant touch.</p>
</p>
<h3>Storing and Preserving Homemade Pasta</h3>
</p>
<p>If you have leftover pasta, or if you’ve made a big batch, proper storage is essential.</p>
</p>
<h4>Short-Term Storage: Refrigeration Techniques</h4>
</p>
<p>To store fresh pasta in the refrigerator, dust it lightly with flour and place it in an airtight container. It will keep well for up to 2 days. If you’re storing cooked pasta, toss it with a bit of olive oil to prevent sticking before sealing it in a container.</p>
</p>
<h4>Long-Term Storage: Freezing Homemade Pasta</h4>
</p>
<p>For long-term storage, fresh pasta can be frozen. Lay the cut pasta on a baking sheet in a single layer and freeze until solid. Once frozen, transfer it to a zip-top bag or airtight container. This method prevents it from clumping together and allows you to take out only what you need.</p>
</p>
<h4>How to Reheat and Serve Leftover Pasta</h4>
</p>
<p>To reheat leftover cooked pasta, bring a pot of salted water to a boil and dunk the pasta for a few seconds to warm it through. Alternatively, you can reheat it in a skillet with a splash of water or sauce over medium heat, stirring gently.</p>
</p>
<h3>Exploring Variations and Customizations</h3>
</p>
<p>Making pasta at home allows for endless possibilities in terms of flavors and dietary requirements.</p>
</p>
<h4>Flavored Pasta: Infusing Herbs and Spices</h4>
</p>
<p>Experiment with different flavors by incorporating herbs and spices into your dough. Spinach, beet, or squid ink can add vibrant color and taste. Simply blend the desired ingredient with the eggs before mixing with flour, ensuring an even distribution of flavor.</p>
</p>
<h4>Gluten-Free Alternatives: How to Make Pasta Without Wheat</h4>
</p>
<p>For those avoiding gluten, try using alternative flours like rice flour, chickpea flour, or a gluten-free blend. The process is similar, but you may need to adjust the liquid content, as gluten-free flours absorb moisture differently.</p>
</p>
<h4>Vegan Pasta Options: Substitutes for Eggs</h4>
</p>
<p>Vegan pasta can be made using just flour and water, eliminating eggs entirely. For a richer flavor, consider adding pureed vegetables like pumpkin or spinach.</p>
</p>
<h3>The Benefits of Making Pasta at Home</h3>
</p>
<p>Homemade pasta is not just about the end product; it also has numerous benefits that make the effort worthwhile.</p>
</p>
<h4>Healthier Ingredients: Controlling What Goes In</h4>
</p>
<p>When you make pasta from scratch, you control every ingredient, allowing you to avoid preservatives and additives found in many store-bought versions. You can also choose organic or whole grain flours for a healthier alternative.</p>
</p>
<h4>Cost-Effectiveness: A Comparison with Store-Bought Options</h4>
</p>
<p>While it may seem daunting at first, making pasta at home can be more cost-effective than purchasing high-quality dried pasta. The ingredients are simple and inexpensive, and you can create larger batches for a fraction of the price.</p>
</p>
<h4>The Joy of Cooking: A Therapeutic Experience</h4>
</p>
<p>Many find the process of making pasta to be therapeutic. The tactile nature of kneading dough and the satisfaction of creating something from scratch provides a rewarding culinary experience.</p>
</p>
<h4>Bonding with Family and Friends: Cooking Together</h4>
</p>
<p>Pasta making can also be a social activity. Invite family or friends to join you in the kitchen. Sharing the task of rolling, cutting, and cooking can lead to a fun and memorable experience.</p>
</p>
<h3>Conclusion</h3>
</p>
<p>Homemade pasta is a labor of love that yields delicious and satisfying results. From the joy of crafting your own dough to the satisfaction of serving it to family and friends, every step is worth it. Whether you choose to keep it simple with a classic sauce or get creative with seasonal ingredients, the possibilities are endless.</p>
</p>
<p>Embrace the art of pasta making, experiment with different ingredients and techniques, and enjoy the culinary journey that awaits you in your kitchen. With practice, you will refine your skills and create pasta dishes that are not only flavorful but also a testament to your dedication and creativity. So roll up your sleeves, grab your flour, and start your homemade pasta adventure today!</p>
</div>

Welcome to the world of indulgent desserts where flavors come together to create a slice of heaven! Today, we’re diving into the delightful realm of Luscious Blueberry Cheesecake Bars. These bars are not just a sweet treat; they are a celebration of the vibrant taste of fresh blueberries combined with the creamy richness of cheesecake. Perfect for summer gatherings, potlucks, or a cozy night in, these cheesecake bars are sure to impress both your family and friends.

Luscious Blueberry Cheesecake Bars

Discover a delicious twist on dessert with this luscious blueberry cheesecake bars recipe! These bars combine a buttery graham cracker crust with a creamy, velvety cheesecake filling, topped with fresh blueberries for a refreshing finish. Perfect for any occasion, these easy-to-make treats are sure to impress. Learn how to create this delightful dessert from scratch, embracing the joy of baking while using high-quality ingredients for the best results. Indulge in this sweet escape today!

Ingredients
  

For the crust:

1 ½ cups graham cracker crumbs

⅓ cup granulated sugar

½ cup unsalted butter, melted

For the cheesecake filling:

16 oz (2 packages) cream cheese, softened

½ cup granulated sugar

2 large eggs

1 teaspoon vanilla extract

1 tablespoon all-purpose flour

1 cup sour cream

For the blueberry topping:

2 cups fresh blueberries (or frozen, thawed)

½ cup granulated sugar

1 tablespoon lemon juice

1 tablespoon cornstarch

¼ cup water

For garnish:

Optional: whipped cream and additional blueberries

Instructions
 

Preheat the Oven: Preheat your oven to 325°F (163°C). Line an 8x8-inch baking pan with parchment paper, leaving some overhang for easy removal later, and lightly grease it.

    Make the Crust: In a mixing bowl, combine graham cracker crumbs and sugar. Stir in melted butter until the mixture resembles wet sand. Press this mixture firmly into the bottom of the prepared pan. Bake for 10 minutes, then remove from the oven and let it cool slightly.

      Prepare the Cheesecake Filling: In a large mixing bowl, beat the softened cream cheese with an electric mixer until smooth. Gradually add the sugar and mix until creamy. Add the eggs, one at a time, mixing well after each addition. Scrape down the sides of the bowl. Stir in the vanilla extract and flour until smooth. Finally, fold in the sour cream until fully incorporated.

        Pour the Filling: Pour the cheesecake mixture over the cooled crust and spread it evenly.

          Bake: Bake in the preheated oven for about 30-35 minutes or until the edges are set and the center has a slight jiggle. Turn off the oven, crack the door open, and let the cheesecake cool in the oven for about an hour to prevent cracking.

            Prepare the Blueberry Topping: In a medium saucepan, combine the blueberries, sugar, lemon juice, cornstarch, and water. Cook over medium heat, stirring occasionally, until the mixture begins to bubble and thickens (about 5-7 minutes). Remove from heat and let it cool slightly.

              Assemble the Bars: Once the cheesecake has cooled, spread the blueberry topping evenly over the top. Let it chill in the refrigerator for at least 4 hours, preferably overnight.

                Serve: Once chilled and set, use the parchment overhang to lift the cheesecake from the pan. Cut into bars and serve with a dollop of whipped cream and extra blueberries if desired.

                  Prep Time, Total Time, Servings: 25 min | 5 hours (includes chilling) | 16 bars

                    WANT TO SAVE THIS RECIPE?

                    Leave a Comment

                    Recipe Rating