

Introduction
In recent years, the trend of healthy snacking has gained immense popularity, with more people seeking nutritious yet delicious alternatives to traditional snacks. Amidst this shift, pumpkin has emerged as a star ingredient, celebrated for its versatility and rich flavor.
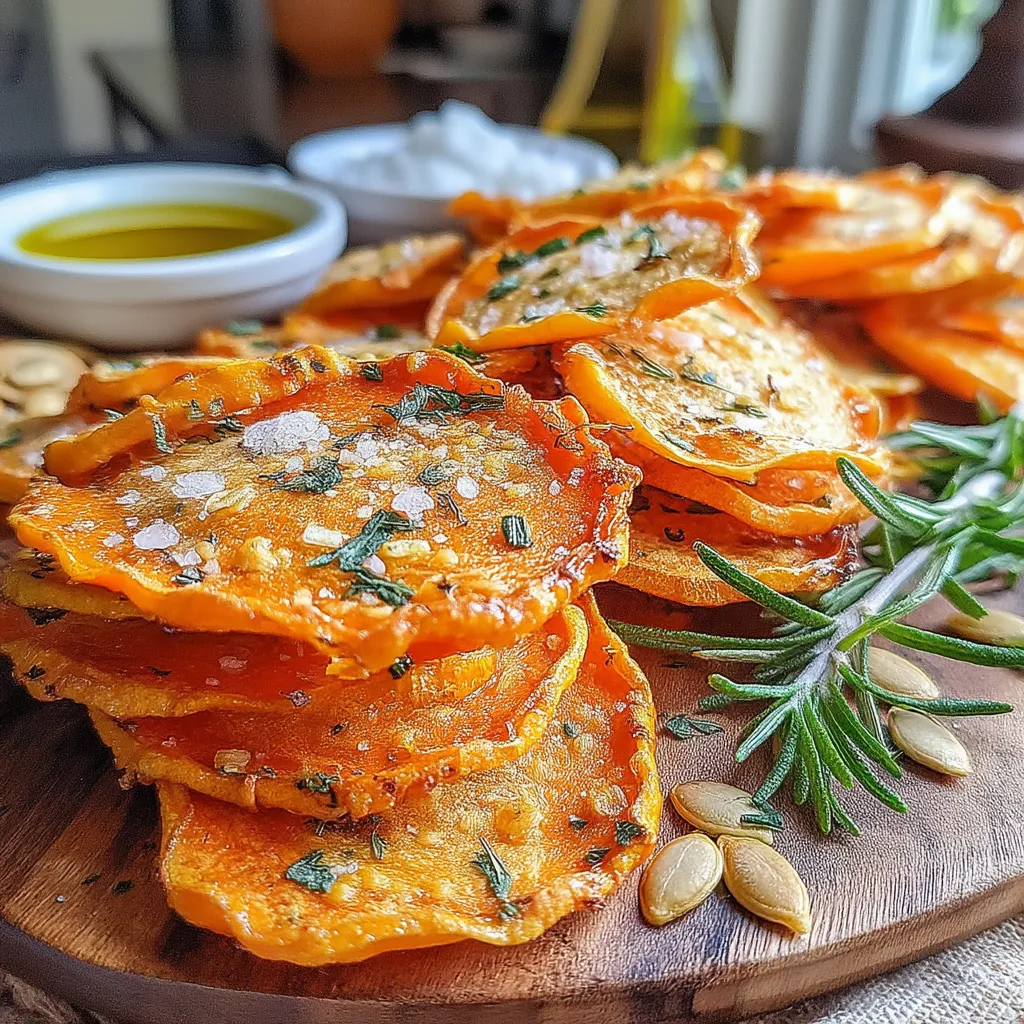
Crispy Herb-Infused Pumpkin Chips with Rosemary offer a delightful way to enjoy this nutrient-packed gourd. These chips are a fantastic alternative to conventional potato chips, providing a satisfying crunch along with the vibrant taste of fresh herbs.
With the combination of pumpkin and rosemary, this recipe not only elevates your snacking experience but also brings numerous health benefits to the table. Let’s dive into this simple yet flavorful recipe!
Recipe Overview
– Total Time: 45 minutes
– Servings: 4
– Difficulty: Easy
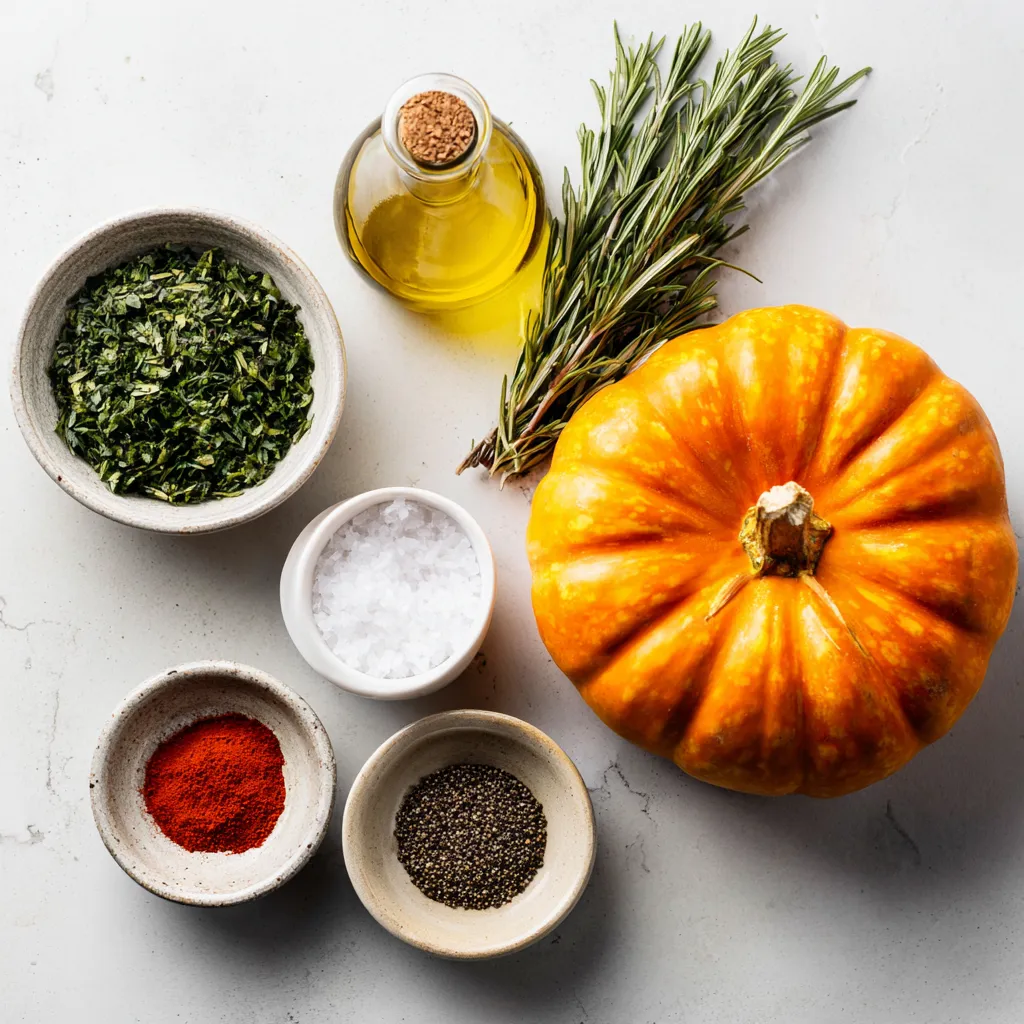
Ingredients
– 1 medium pumpkin
– 2 tablespoons olive oil
– 1 tablespoon fresh rosemary, chopped
– 1 teaspoon sea salt
– 1 teaspoon garlic powder
– 1/2 teaspoon black pepper
– 1/2 teaspoon paprika
Instructions
1. Preheat your oven to 350°F (175°C).
2. Cut the pumpkin in half and scoop out the seeds and fibers.
3. Slice the pumpkin into thin, even chips, about 1/8-inch thick.
4. In a large bowl, combine the olive oil, rosemary, sea salt, garlic powder, black pepper, and paprika.
5. Add the pumpkin chips to the bowl and toss until they are evenly coated with the oil and seasoning mixture.
6. Arrange the seasoned pumpkin chips in a single layer on a baking sheet lined with parchment paper.
7. Bake for 25-30 minutes, or until the chips are golden and crispy, flipping them halfway through to ensure even cooking.
8. Allow the chips to cool slightly before serving.
Understanding the Benefits of Pumpkin
– Nutritional profile of pumpkin
– Health benefits: rich in vitamins, antioxidants, and fiber
– Why pumpkin is a great choice for snacking
Ingredients Breakdown
– Overview of the main ingredient: pumpkin
– Role of olive oil in enhancing flavor and texture
– Importance of fresh herbs: focus on rosemary
– Discussion of seasoning choices: sea salt, garlic powder, black pepper, and paprika
– Optional ingredients and their impact on flavor
Preparing Your Pumpkin for Chips
– Step-by-step guide to selecting the right pumpkin
– Techniques for slicing pumpkin evenly
– Importance of removing seeds and fibers for better chip texture
Seasoning Your Pumpkin Chips
Creating the Perfect Seasoning Mix
Crafting Your Blend
To elevate your pumpkin chips, start by creating a flavorful seasoning mix. Combine sea salt, black pepper, garlic powder, and onion powder in a small bowl. For an herbaceous touch, add dried rosemary, thyme, and a pinch of cayenne pepper for heat. Adjust each ingredient according to your taste preference; for instance, adding more rosemary will enhance the herbal notes.
Achieving an Even Coating
To ensure that each pumpkin slice is evenly coated with seasoning, sprinkle the mix over the slices rather than dumping it all at once. This method allows you to control the amount of seasoning on each chip. Use your hands to gently toss the slices, ensuring that every piece is well-covered without breaking them.
Personalizing the Flavor Profile
Feel free to experiment with different herbs and spices to create a signature flavor. Consider adding smoked paprika for a smoky taste, or nutritional yeast for a cheesy flavor. For a sweeter version, cinnamon and a hint of sugar can transform your chips into a delightful treat.
The Baking Process
Low-Temperature Drying
Baking your pumpkin chips at a low temperature is crucial for achieving that coveted crispiness. Set your oven to 200°F (93°C) and allow the chips to dry out slowly. This method prevents them from burning while ensuring they become perfectly crispy.
Arranging Pumpkin Slices
When placing your pumpkin slices on the baking sheet, ensure they are laid out in a single layer without overlapping. This arrangement allows hot air to circulate around each slice, promoting even cooking. Use parchment paper for an easy cleanup and to prevent sticking.
Understanding Air-Drying
Air-drying your pumpkin chips in the oven is key to their texture. The slow removal of moisture not only contributes to crispiness but also enhances the flavor by concentrating the natural sugars in the pumpkin. Keep the oven door slightly ajar to allow moisture to escape effectively.
Monitoring for Readiness
Keep a close eye on your chips during the last few minutes of baking. Signs of readiness include a light golden color and a firm texture. If you notice any chips browning too quickly, rotate the pan to ensure even baking and prevent burning.
Cooling and Storing Your Chips
Best Practices for Cooling
Once your pumpkin chips are out of the oven, allow them to cool on the baking sheet for a few minutes before transferring them to a wire rack. This cooling method helps maintain their crispness, as it prevents steam from accumulating and making them soggy.
Recommended Storage Methods
Store your cooled pumpkin chips in an airtight container to keep them fresh. Glass jars or resealable plastic bags are excellent choices. Ensure the chips are completely cooled before sealing to avoid moisture buildup.
Shelf Life and Freshness
When stored properly, pumpkin chips can last up to two weeks. To check for freshness, look for any signs of moisture or a change in texture. If they become soft, simply re-bake them for a few minutes to restore their crunch.
Serving Suggestions
Enjoying Your Pumpkin Chips
Pumpkin chips make a versatile snack that can be enjoyed on their own or paired with various dips. Consider serving them with hummus, guacamole, or a tangy yogurt dip for added flavor. They also complement cheese platters beautifully.
Creative Meal Incorporation
Incorporate pumpkin chips into salads for added crunch or use them as a garnish for soups. They can also serve as a unique topping for gourmet burgers or sandwiches, providing a delightful contrast in texture.
Versatility for Different Occasions
These chips are perfect for casual gatherings, movie nights, or as a healthy snack during the day. Their unique flavor and crunch make them a hit at parties, and they can easily be customized to suit any event.
Conclusion
Making crispy herb-infused pumpkin chips at home is not only simple but also offers a healthier alternative to store-bought snacks. With just a few ingredients and a little time, you can create a delicious treat that your family and friends will love. Embrace the joy of homemade snacks and enjoy the satisfaction that comes with crafting your own culinary delights. Try this recipe today and discover the delightful taste of your very own pumpkin chips!

Crispy Herb-Infused Pumpkin Chips with Rosemary
Ingredients
- 1.5 pounds medium-sized pumpkin
- 2 tablespoons olive oil
- 1 tablespoon fresh rosemary, finely chopped
- 1 teaspoon sea salt
- 0.5 teaspoon garlic powder
- 0.25 teaspoon black pepper
- 0.0 teaspoon paprika
Instructions
- Preheat your oven to 200°F (93°C). Line two baking sheets with parchment paper or silicone mats.
- Cut the pumpkin in half and scoop out the seeds and stringy bits. Slice the pumpkin into thin, even slices, about 0.125 inch thick.
- In a large mixing bowl, combine olive oil, chopped rosemary, sea salt, garlic powder, black pepper, and paprika. Mix well.
- Add the pumpkin slices to the bowl and toss until coated with the seasoning mixture.
- Spread the seasoned pumpkin slices in a single layer on the baking sheets without overlapping.
- Place the baking sheets in the oven and allow the pumpkin slices to air-dry for about 120 to 180 minutes, flipping halfway through.
- Keep an eye on them during the last hour to ensure they don’t burn. The chips should be crisp and lightly golden.
- Once dried, remove the chips from the oven and let them cool completely on a wire rack.
- Store the cooled chips in an airtight container at room temperature.