
Introduction to Delightful Mini Summer Fruit Tarts
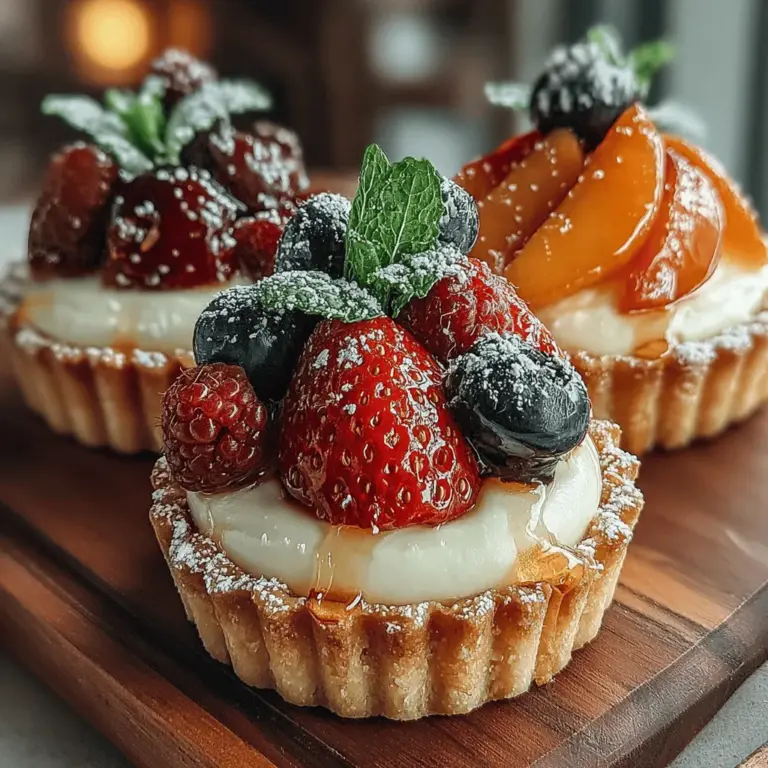
Summer is a season synonymous with vibrant colors and mouthwatering flavors, especially when it comes to fresh fruits. As the sun shines and gardens flourish, there’s no better way to celebrate the bounty of nature than with a batch of delightful mini summer fruit tarts. These charming little desserts are not only a feast for the eyes but also a delightful treat for your taste buds, combining a buttery tart shell, a creamy pastry filling, and an array of seasonal fruits that burst with flavor.
Originating from classic French pastry-making traditions, fruit tarts have become a beloved dessert across the globe. The mini version of these tarts offers a perfect single-serving option, making them ideal for summer gatherings, picnics, and elegant soirées. Whether you are celebrating a special occasion or simply indulging in a sweet treat on a warm afternoon, these mini tarts are sure to impress your guests and satisfy your cravings.
In this article, we will guide you through the process of creating these delightful summer fruit tarts, focusing on each component to ensure that every bite is filled with the essence of summer. From crafting the perfect buttery tart shell to preparing a luscious pastry filling, and finally, selecting the freshest fruits, we will cover all the essential steps to make your tarts a resounding success.
Understanding the Components of Mini Summer Fruit Tarts
Creating the perfect mini summer fruit tart involves understanding the integral components that come together to form this exquisite dessert. Each element plays a crucial role in achieving the desired texture, flavor, and presentation.
The Tart Shells: A Buttery Base for Your Tarts
The foundation of any good tart is its shell, and for these mini summer fruit tarts, we want a base that is buttery, flaky, and complements the smooth filling and fresh fruits. The ingredients for the tart shell are simple yet vital:
– All-purpose flour: Provides the structure for the tart shell.
– Cold unsalted butter: The star ingredient that brings richness and flakiness. Using cold butter ensures that the fat remains solid during baking, leading to a tender crust.
– Sugar: A touch of sweetness enhances the flavor of the tart shell.
– Egg yolk: Adds richness and acts as a binding agent.
– Ice water: Helps bring the dough together without warming it up.
Importance of Using Cold Butter for Flakiness
When preparing the tart shell, the temperature of your ingredients is crucial. Cold butter is essential because it creates pockets of steam as it melts during baking, which leads to a flaky texture. If the butter is too warm, it will blend too thoroughly with the flour, resulting in a dense and tough crust rather than the light and airy finish we desire.
Step-by-Step Process for Preparing Tart Shells
1. Mix the Dry Ingredients: In a large mixing bowl, combine the all-purpose flour and sugar.
2. Cut in the Butter: Using a pastry cutter or your fingertips, work the cold butter into the flour mixture until it resembles coarse crumbs.
3. Add the Egg Yolk: Incorporate the egg yolk and mix until just combined.
4. Add Ice Water: Gradually add ice water, one tablespoon at a time, mixing until the dough comes together. Be careful not to overwork it.
5. Chill the Dough: Wrap the dough in plastic wrap and refrigerate for at least 30 minutes to allow it to rest and firm up.
6. Roll Out the Dough: On a lightly floured surface, roll out the chilled dough to about 1/8 inch thick. Cut into circles that are slightly larger than your tartlet pans.
7. Fit the Dough into Pans: Gently press the dough into the tartlet pans, trimming any excess.
8. Blind Bake: To avoid a soggy bottom, blind bake the tart shells by placing parchment paper over the dough and filling it with pie weights or dried beans. Bake at 350°F (175°C) for about 15 minutes, then remove the weights and parchment and bake for an additional 5-10 minutes until golden brown.
Tips for Achieving the Perfect Crust Texture
– Don’t Overmix: Overworking the dough can lead to a tough crust. Mix just until combined.
– Keep Ingredients Cold: Ensure your butter and water are icy to maintain the desired texture.
– Use Pie Weights: Blind baking with weights helps maintain the shape of the shell and prevents puffing.
With your tart shells prepared and ready, the next step is to create the luxurious pastry filling that will serve as the heart of your mini summer fruit tarts.
The Creamy Pastry Filling: A Luxurious Center
The creamy pastry filling is what elevates these mini tarts from simple desserts to indulgent treats. This filling is traditionally made with a base of pastry cream, which is smooth, velvety, and rich in flavor. Here’s a quick overview of the key ingredients commonly used to make pastry cream:
– Milk: Provides a creamy base for the filling.
– Egg yolks: Contribute richness and help to thicken the cream.
– Sugar: Sweetens the filling and balances the tartness of the fruits.
– Cornstarch: Acts as a thickening agent, giving the filling its ideal consistency.
– Vanilla extract: Adds aromatic flavor to enhance the overall taste.
Role of Each Ingredient in Creating a Smooth Texture
Each ingredient in the pastry cream works harmoniously to create a smooth, luxurious filling. The milk and egg yolks combine to form a custard base, while the sugar lends sweetness. Cornstarch thickens the mixture, ensuring that it sets up properly without being overly runny. The vanilla extract not only adds flavor but also elevates the overall taste profile, making each bite a delightful experience.
Step-by-Step Process for Making Pastry Cream
1. Heat the Milk: In a saucepan, gently heat the milk over medium heat until it just begins to steam. Do not let it boil.
2. Whisk the Egg Yolks and Sugar: In a separate bowl, whisk together the egg yolks and sugar until the mixture becomes thick and pale.
3. Add Cornstarch: Stir in the cornstarch until fully incorporated.
4. Temper the Egg Mixture: Gradually pour the hot milk into the egg mixture, whisking constantly to prevent the eggs from curdling.
5. Cook the Mixture: Return the mixture to the saucepan and cook over medium heat, whisking continuously until it thickens and bubbles. This should take about 2-3 minutes.
6. Add Vanilla: Once thickened, remove from heat and stir in vanilla extract.
7. Cool the Pastry Cream: Pour the pastry cream into a bowl, cover it with plastic wrap directly on the surface to prevent a skin from forming, and let it cool completely in the refrigerator.
Discussion on Variations of Pastry Cream (Flavorings, etc.)
While vanilla pastry cream is a classic choice, you can easily customize it to suit your preferences. Consider adding flavors such as almond extract, citrus zest, or even coffee for a unique twist. For a chocolate variation, simply melt high-quality chocolate into the warm pastry cream before cooling.
With the pastry filling ready, you can now explore the vibrant fruit toppings that will complete your delightful mini summer fruit tarts. The next section will delve into selecting and preparing the fresh fruits that will grace your tarts, adding both color and flavor to this already exquisite dessert.
Simple Recipe for Apricot Glaze
To add a beautiful shine to your fruits and enhance their flavor, an apricot glaze is the perfect finishing touch for your mini summer fruit tarts. This simple glaze will not only help your fruits look fresh but will also add a hint of sweetness.
Ingredients for Apricot Glaze
– 1/2 cup apricot preserves
– 2 tablespoons water
– 1 teaspoon lemon juice
Instructions
1. Combine the Ingredients: In a small saucepan, combine the apricot preserves, water, and lemon juice.
2. Heat and Stir: Place the saucepan over medium heat and stir until the preserves have melted and the mixture is smooth, about 2-3 minutes.
3. Cool the Glaze: Remove from heat and let it cool slightly before using. It should be warm, not hot when you apply it to the fruits.
Techniques for Applying Glaze to Fruits for Shine
To achieve a professional-looking finish, it’s essential to apply the glaze properly:
1. Use a Soft Brush: A pastry brush is ideal for applying the glaze gently. This will prevent any damage to the delicate fruits.
2. Brush Lightly: Dip the brush into the glaze and lightly brush over the surface of the fruits. Start from the top and work your way down to ensure even coverage.
3. Avoid Over-Saturation: Be careful not to soak the fruits; a light coating is sufficient for that glossy finish.
Step-by-Step Instructions for Assembling Mini Summer Fruit Tarts
Preparing the Tart Shells
The tart shell is the foundation of your mini fruit tarts. A buttery, flaky crust will complement the rich pastry cream and fresh fruits perfectly.
Mixing and Chilling Dough
1. Combine the Ingredients: In a large mixing bowl, combine 1 1/2 cups all-purpose flour, 1/2 cup unsalted butter (cold and cubed), 1/4 cup sugar, and a pinch of salt.
2. Blend the Mixture: Using a pastry cutter or your fingertips, blend the ingredients until the mixture resembles coarse crumbs.
3. Add Egg: Incorporate 1 large egg yolk and 1-2 tablespoons of cold water, mixing gently until the dough comes together.
4. Chill the Dough: Shape the dough into a disc, wrap it in plastic wrap, and refrigerate for at least 30 minutes.
Importance of Blind Baking and Achieving a Golden Crust
1. Preheat the Oven: Preheat your oven to 375°F (190°C).
2. Roll Out the Dough: On a lightly floured surface, roll out the chilled dough to about 1/8-inch thickness.
3. Cut and Fit into Tartlet Molds: Cut out circles that fit your mini tartlet pans and gently press the dough into the molds. Prick the bottoms with a fork to prevent bubbling.
4. Blind Bake: Place a piece of parchment paper over the dough and fill with pie weights or dried beans. Bake for 15 minutes, then remove the weights and parchment, and bake for an additional 5-7 minutes or until golden brown.
5. Cool the Shells: Allow the tart shells to cool completely before filling.
Making the Pastry Cream
Pastry cream is essential for these tarts; it provides a rich and creamy base that pairs beautifully with fresh fruits.
Ensuring a Smooth and Lump-Free Pastry Cream
1. Combine Ingredients: In a medium saucepan, whisk together 2 cups whole milk, 1/2 cup sugar, and a pinch of salt.
2. Heat the Mixture: Bring the mixture to a gentle simmer over medium heat, stirring occasionally.
3. Mix Egg Yolks and Starch: In a separate bowl, whisk together 4 large egg yolks and 1/4 cup cornstarch until smooth.
4. Temper the Egg Mixture: Gradually pour the hot milk mixture into the egg yolk mixture, whisking constantly to temper the yolks.
5. Cook Until Thickened: Return the mixture to the saucepan and cook over medium heat, stirring constantly until thickened, about 3-5 minutes.
6. Add Flavor: Remove from heat and stir in 1 teaspoon vanilla extract and 2 tablespoons of unsalted butter for richness.
Cooling Techniques to Prevent Skin Formation
1. Transfer to a Bowl: Pour the pastry cream into a clean bowl.
2. Cover with Plastic Wrap: Place a piece of plastic wrap directly on the surface of the cream to prevent a skin from forming.
3. Chill in the Refrigerator: Allow it to cool completely in the refrigerator for at least 2 hours before using.
Assembling the Tarts
Now that you have your tart shells and pastry cream ready, it’s time to assemble your delightful mini summer fruit tarts.
Tips for Filling Tart Shells Evenly with Pastry Cream
1. Use a Piping Bag: Fill a piping bag fitted with a round tip with the cooled pastry cream. This allows for easy and even filling of each tart shell.
2. Fill Generously: Pipe the cream into each tart shell, filling them to the top without overflowing.
Creative Ways to Arrange Fruits for Visual Appeal
1. Choose a Variety of Fruits: Select a colorful assortment of summer fruits such as strawberries, blueberries, kiwi, and peaches.
2. Create Patterns: Arrange the fruits in a circular pattern or in a rainbow layout for a stunning visual effect.
3. Balance Colors: Ensure a good balance of colors and sizes for an eye-catching presentation.
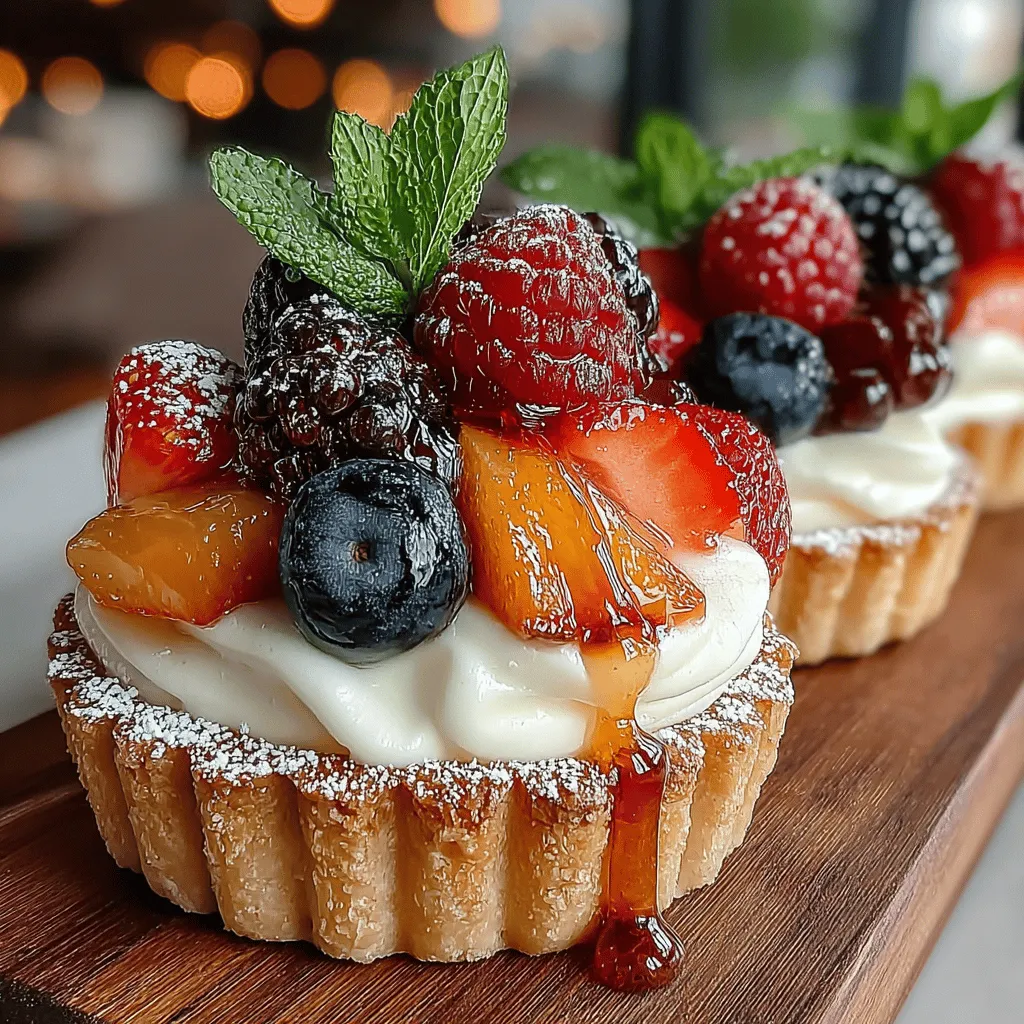
Applying the Glaze and Garnishing
Finishing touches can elevate your tarts, making them irresistibly appealing.
Techniques for Brushing Glaze Without Damaging Fruits
1. Be Gentle: Use a soft brush to carefully apply the apricot glaze over the arranged fruits, ensuring not to disturb their placement.
2. Glaze in Layers: If necessary, apply a second layer after the first has set for an extra glossy finish.
Suggestions for Garnishing with Fresh Mint Leaves
1. Add Freshness: Place a small mint leaf on top of each tart for a pop of color and added freshness.
2. Use Edible Flowers: Consider adding edible flowers for a touch of elegance.
Serving and Storing Mini Summer Fruit Tarts
To enjoy these tarts at their best, follow these serving and storing tips.
Ideal Serving Temperatures for Taste and Texture
– Serve the mini tarts chilled to enhance the creamy texture of the pastry cream and the freshness of the fruits. Aim for a temperature of about 40-45°F (4-7°C) for optimal flavor.
Best Practices for Storing Tarts to Maintain Freshness
– Store any leftover tarts in an airtight container in the refrigerator for up to 2 days. However, it’s best to assemble them just before serving to maintain the crispness of the tart shells and the freshness of the fruits.
Suggestions for Serving the Tarts at Gatherings
– These mini summer fruit tarts make a delightful addition to any gathering, whether it’s a summer barbecue, a picnic, or a formal dinner party. Arrange them on a decorative platter for an impressive presentation and watch them disappear!
Conclusion: Enjoying Your Mini Summer Fruit Tarts
Mini summer fruit tarts are not only a feast for the eyes but also a delightful culmination of summer’s best flavors. With a buttery tart shell, rich pastry cream, and a medley of fresh fruits, these tarts are sure to be a hit at any gathering. By following the step-by-step guide outlined above, you can create these charming desserts that celebrate the essence of summer. Enjoy the process of baking, assembling, and sharing these tarts with friends and family, and savor each delicious bite of this seasonal treat.
Whether you’re indulging in one after dinner or serving a platter full to guests, each mini summer fruit tart promises to deliver a burst of flavor and joy. Celebrate the season with this delightful recipe and enjoy the sweet moments that come with it.
